
Pinterest strikes again! I can’t make my way through Pinterest in January leading up to February without seeing a gorgeous floral arrangement. The algorithm is too genius for my own good. Venus energy is strong with Pinterest and that’s what inspired me this Valentine’s season for a DIY luxury flower box arrangement. If you have researched this type of flower arrangement, you know they can have a retail value above $200 (plus ridiculous fees and shipping) but I found a way to get my dreamy flower arrangement for less. If you have the “made with love” motivation then you can gift the flower box with an added bonus of homemade chocolate. I suppose making extra gifts depends on how you feel after creating this arrangement but I think it’s as simple to create as–well take a look below and judge for yourself.
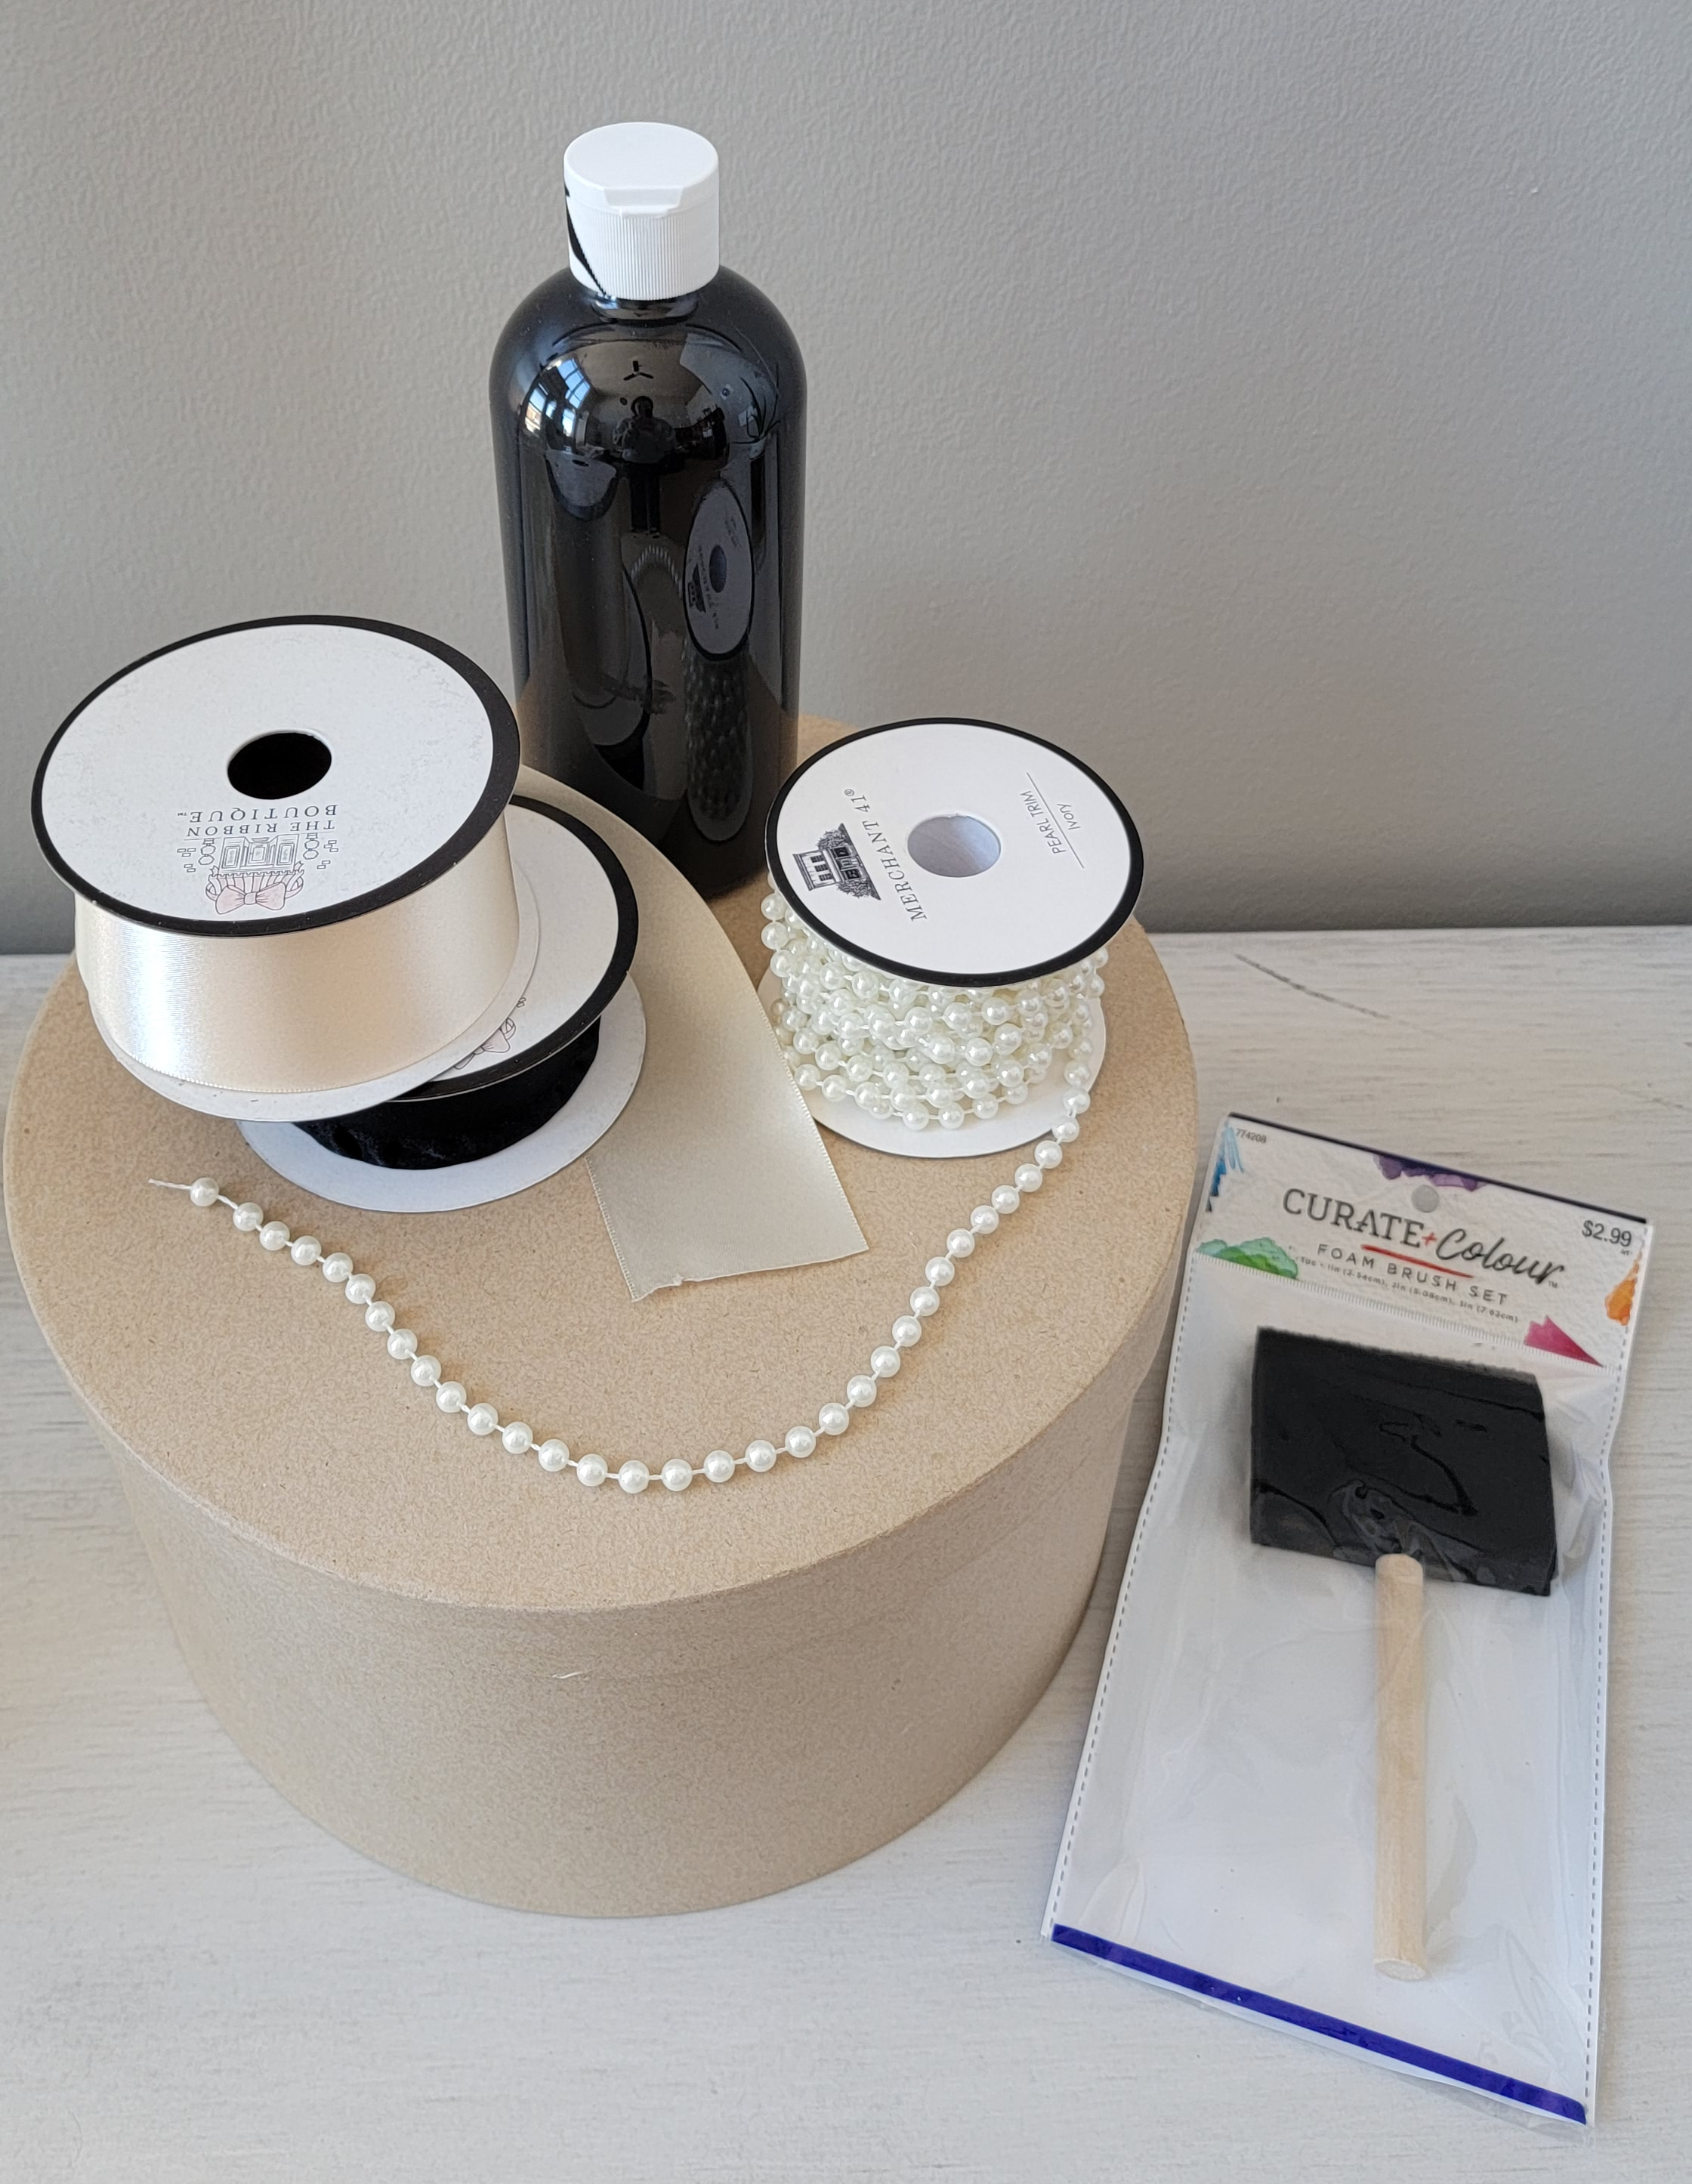
Things you’ll need for this project
- Paper Mache Box: similar here
- Flowers artificial (similar) or real depending on preference
- Paint: similar here
- Paint Brush: similar here
- Hot Glue and Gun: similar here
- Ribbon of your choice
- A string of Pearls: similar here
- Floral Foam (and a large bowl of water) or Dry Foam
- Plastic Lining or tray
- Sharp Knife to cut the foam
- Scissors to cut stems
- Ruler (optional)
Step 1: Paint, paint, paint!
I had to paint several coats over my hat box and lid. It took a total of 4-5 coats but it really depends on the paint and material of the box you use. You can skip the painting by purchasing a pre-colored box online. If you do paint, let it dry between coats and let it dry overnight at least once the last coat of paint is applied. After all of that work, it would be a bummer to smudge the paint.
Step 2: Measure out your plastic if you don’t have a plastic tray. You can skip to the third step if you aren’t using real flowers.

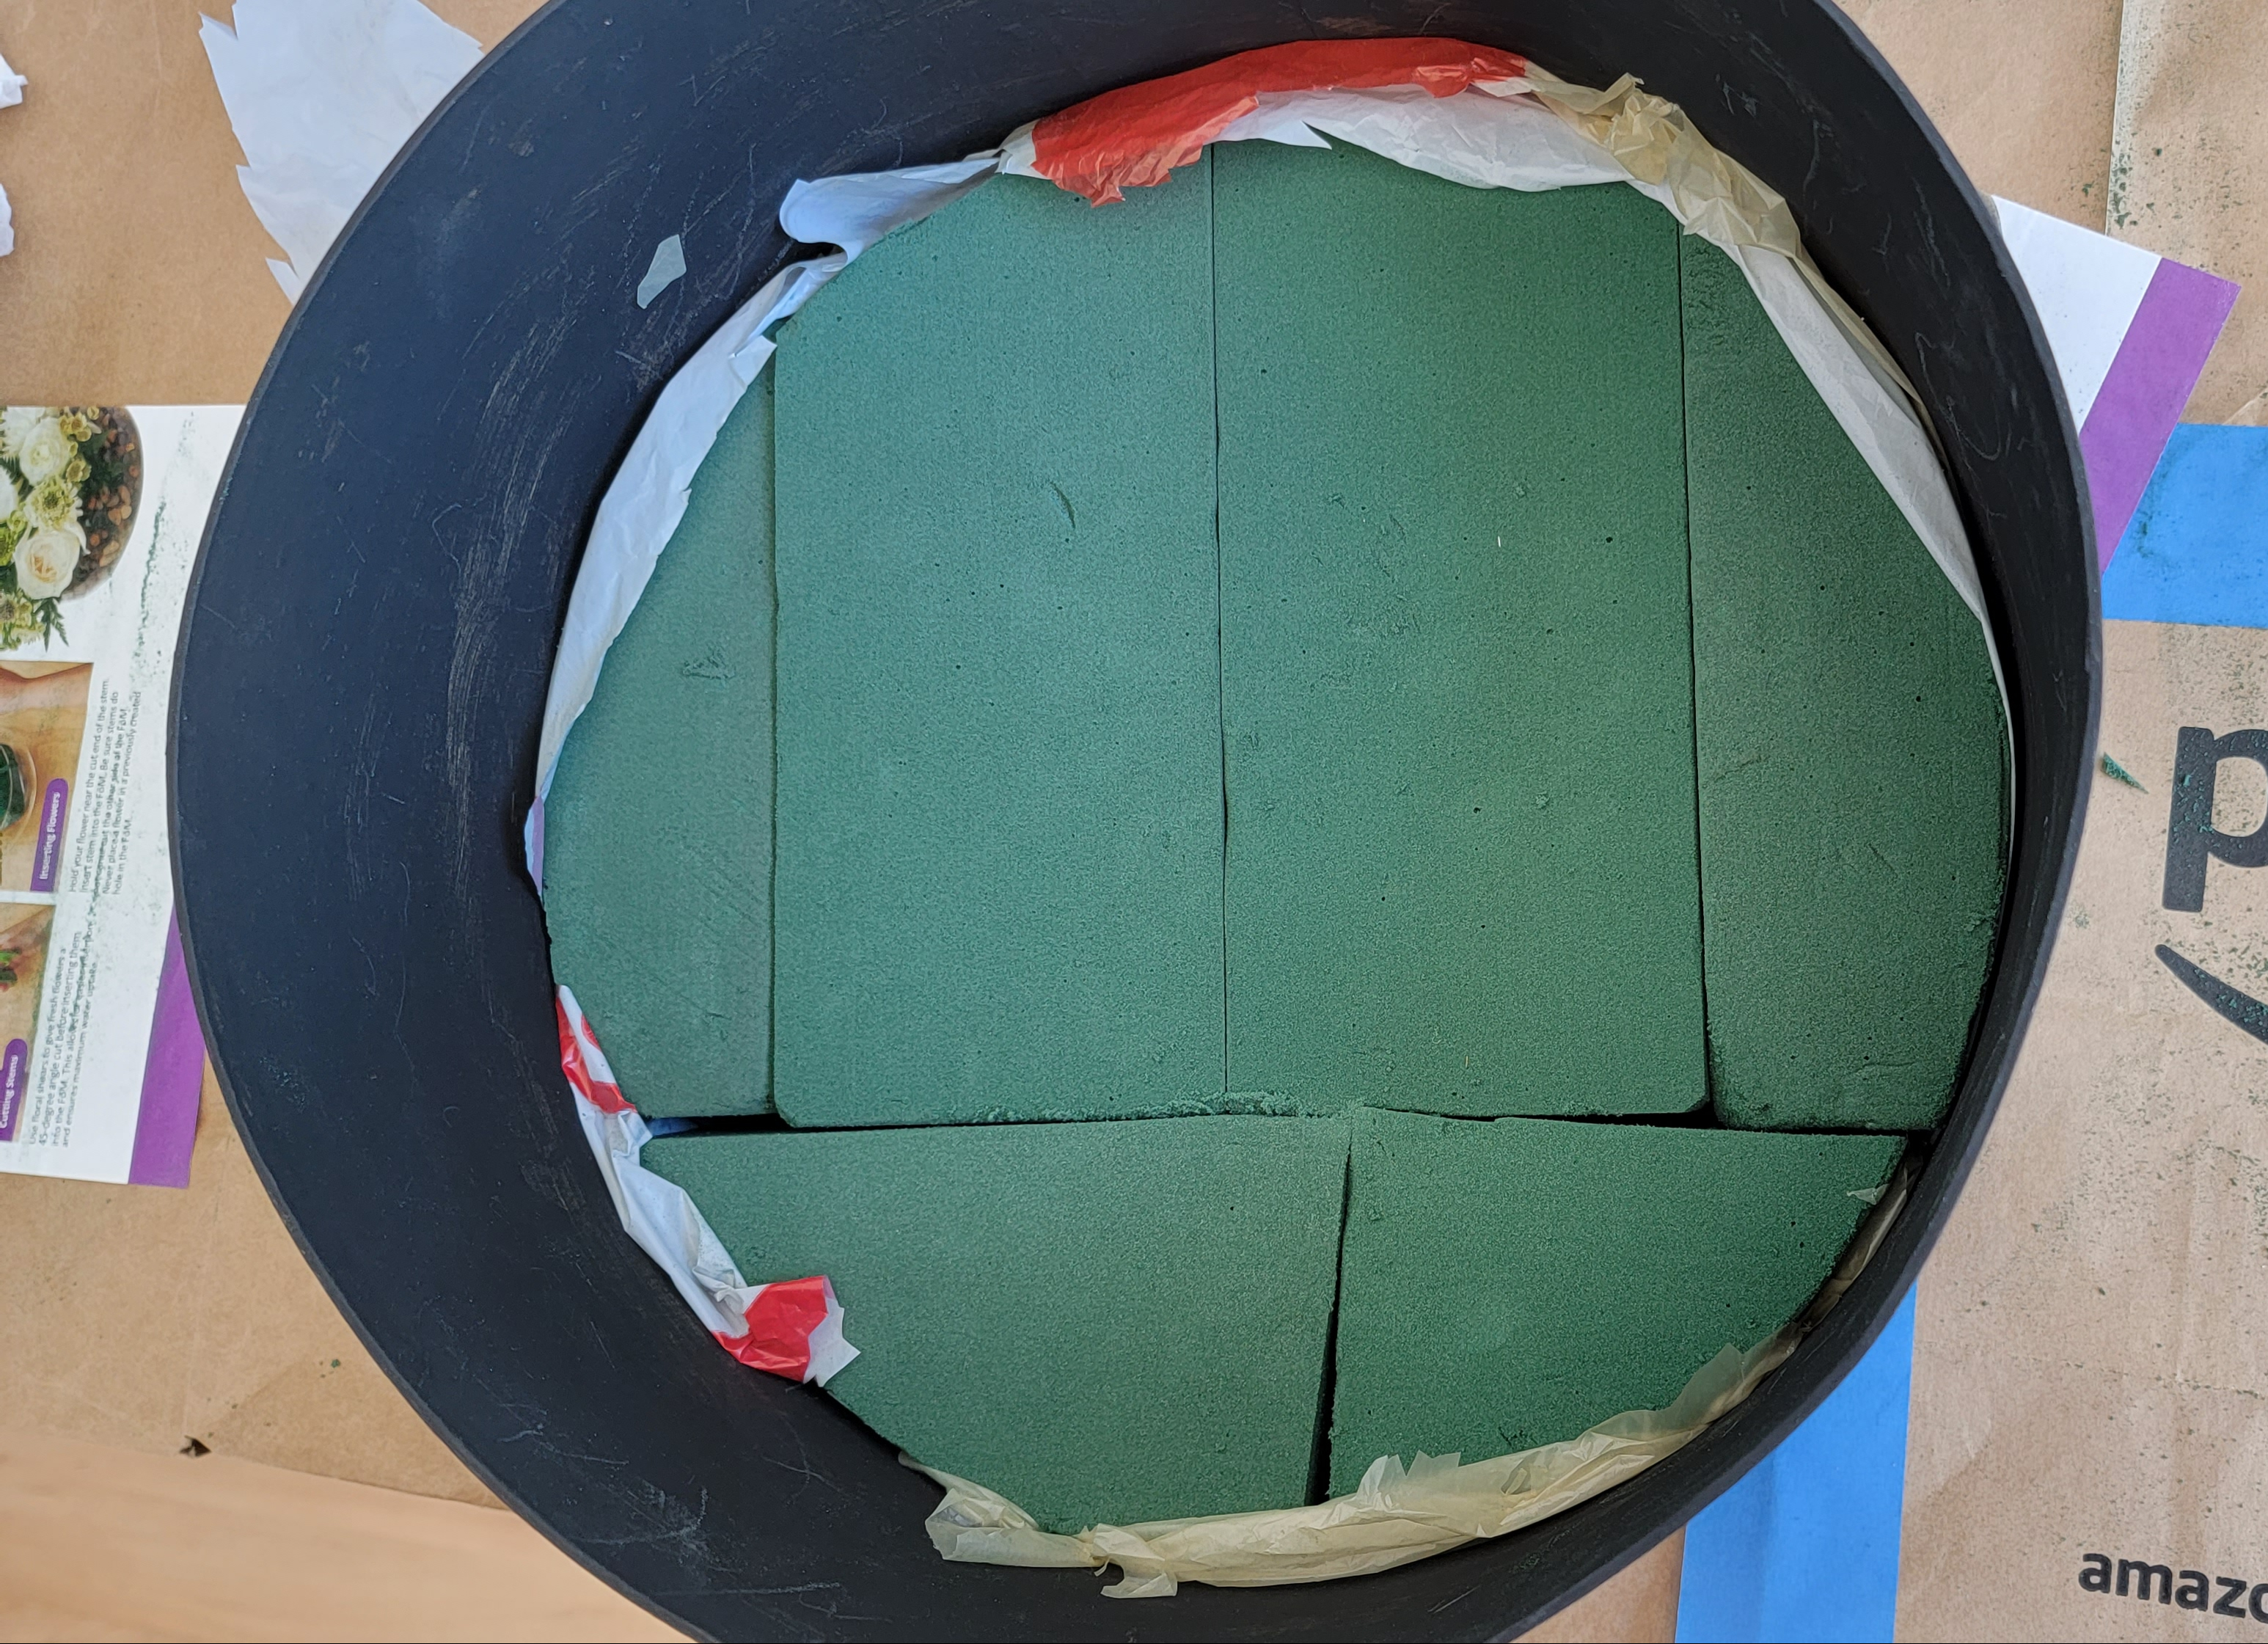
It doesn’t look beautiful yet but trust me. This step is crucial with real flowers. You want to make sure you have a tray or lining inside the box so when you water your flowers the box won’t be ruined and leak out water. For this example, I just used target and grocery bags by cutting around the circumference and making slits on the sides to fit the shape. I also layered several of them just to make sure there wouldn’t be any leaks. As long as the floral foam is below the plastic line (second picture on the slideshow above) and the flowers cover the lining, that’s all that matters.
Step 3: Measure and cut the foam when it’s dry.
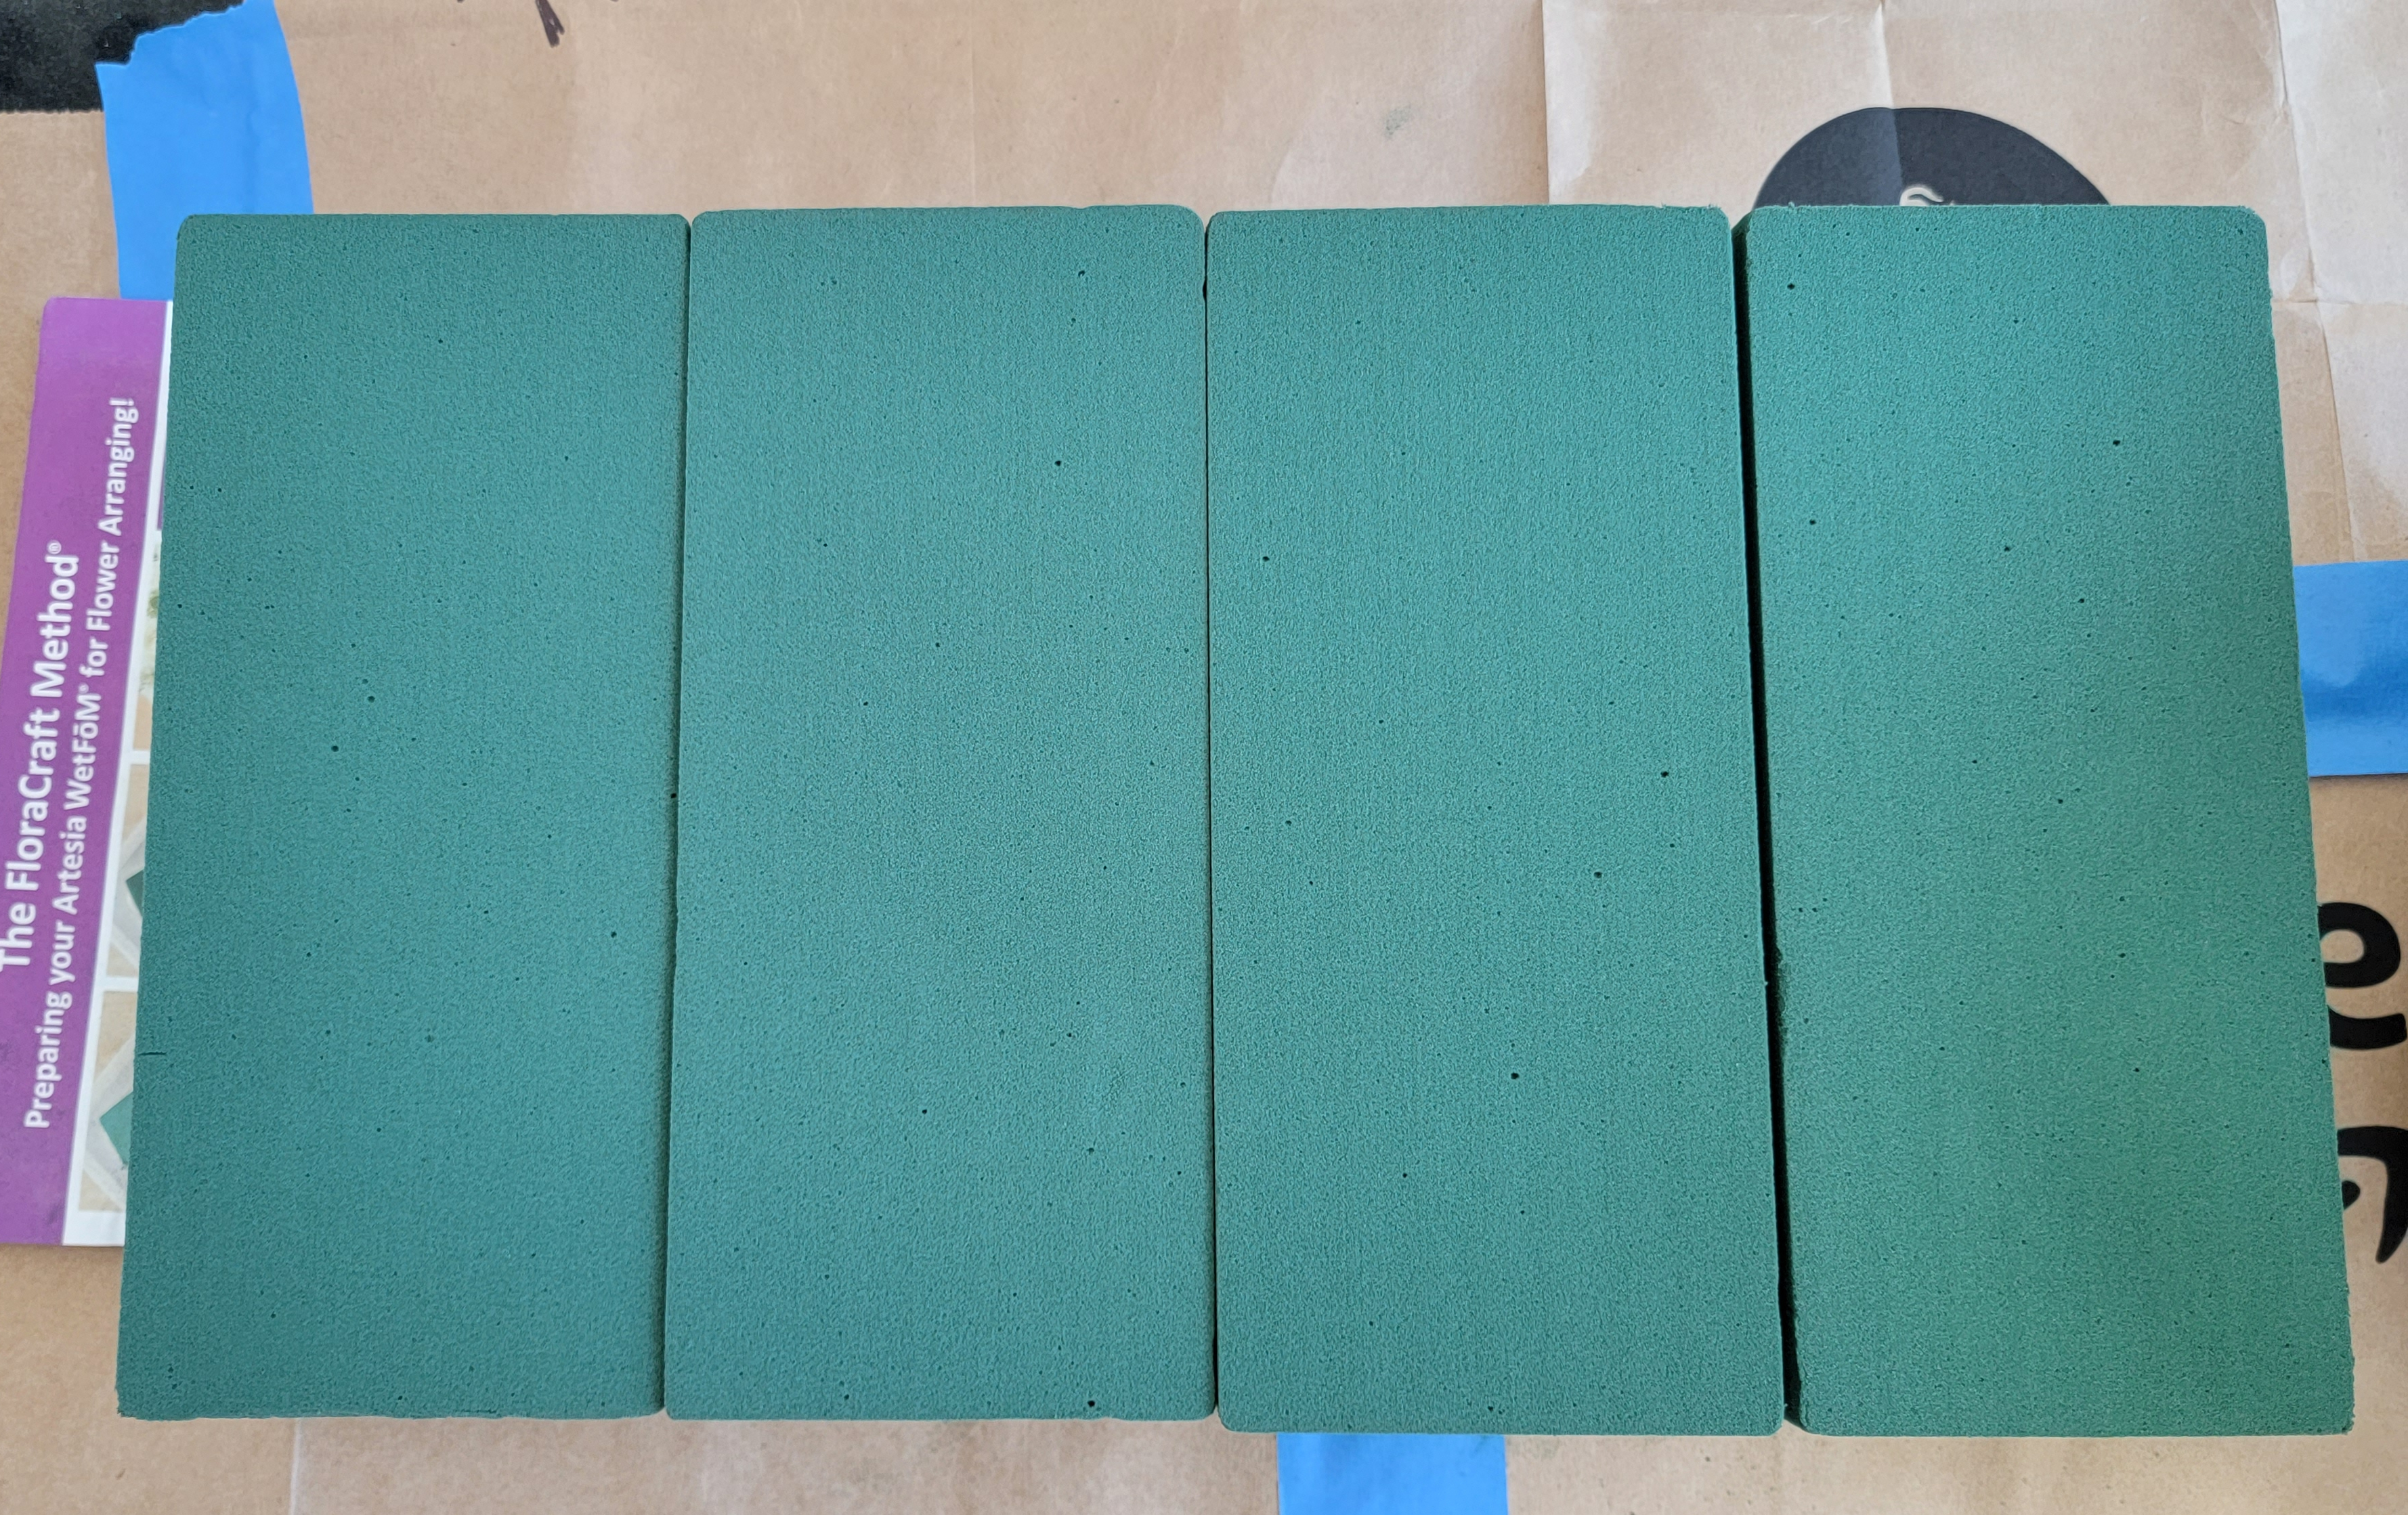
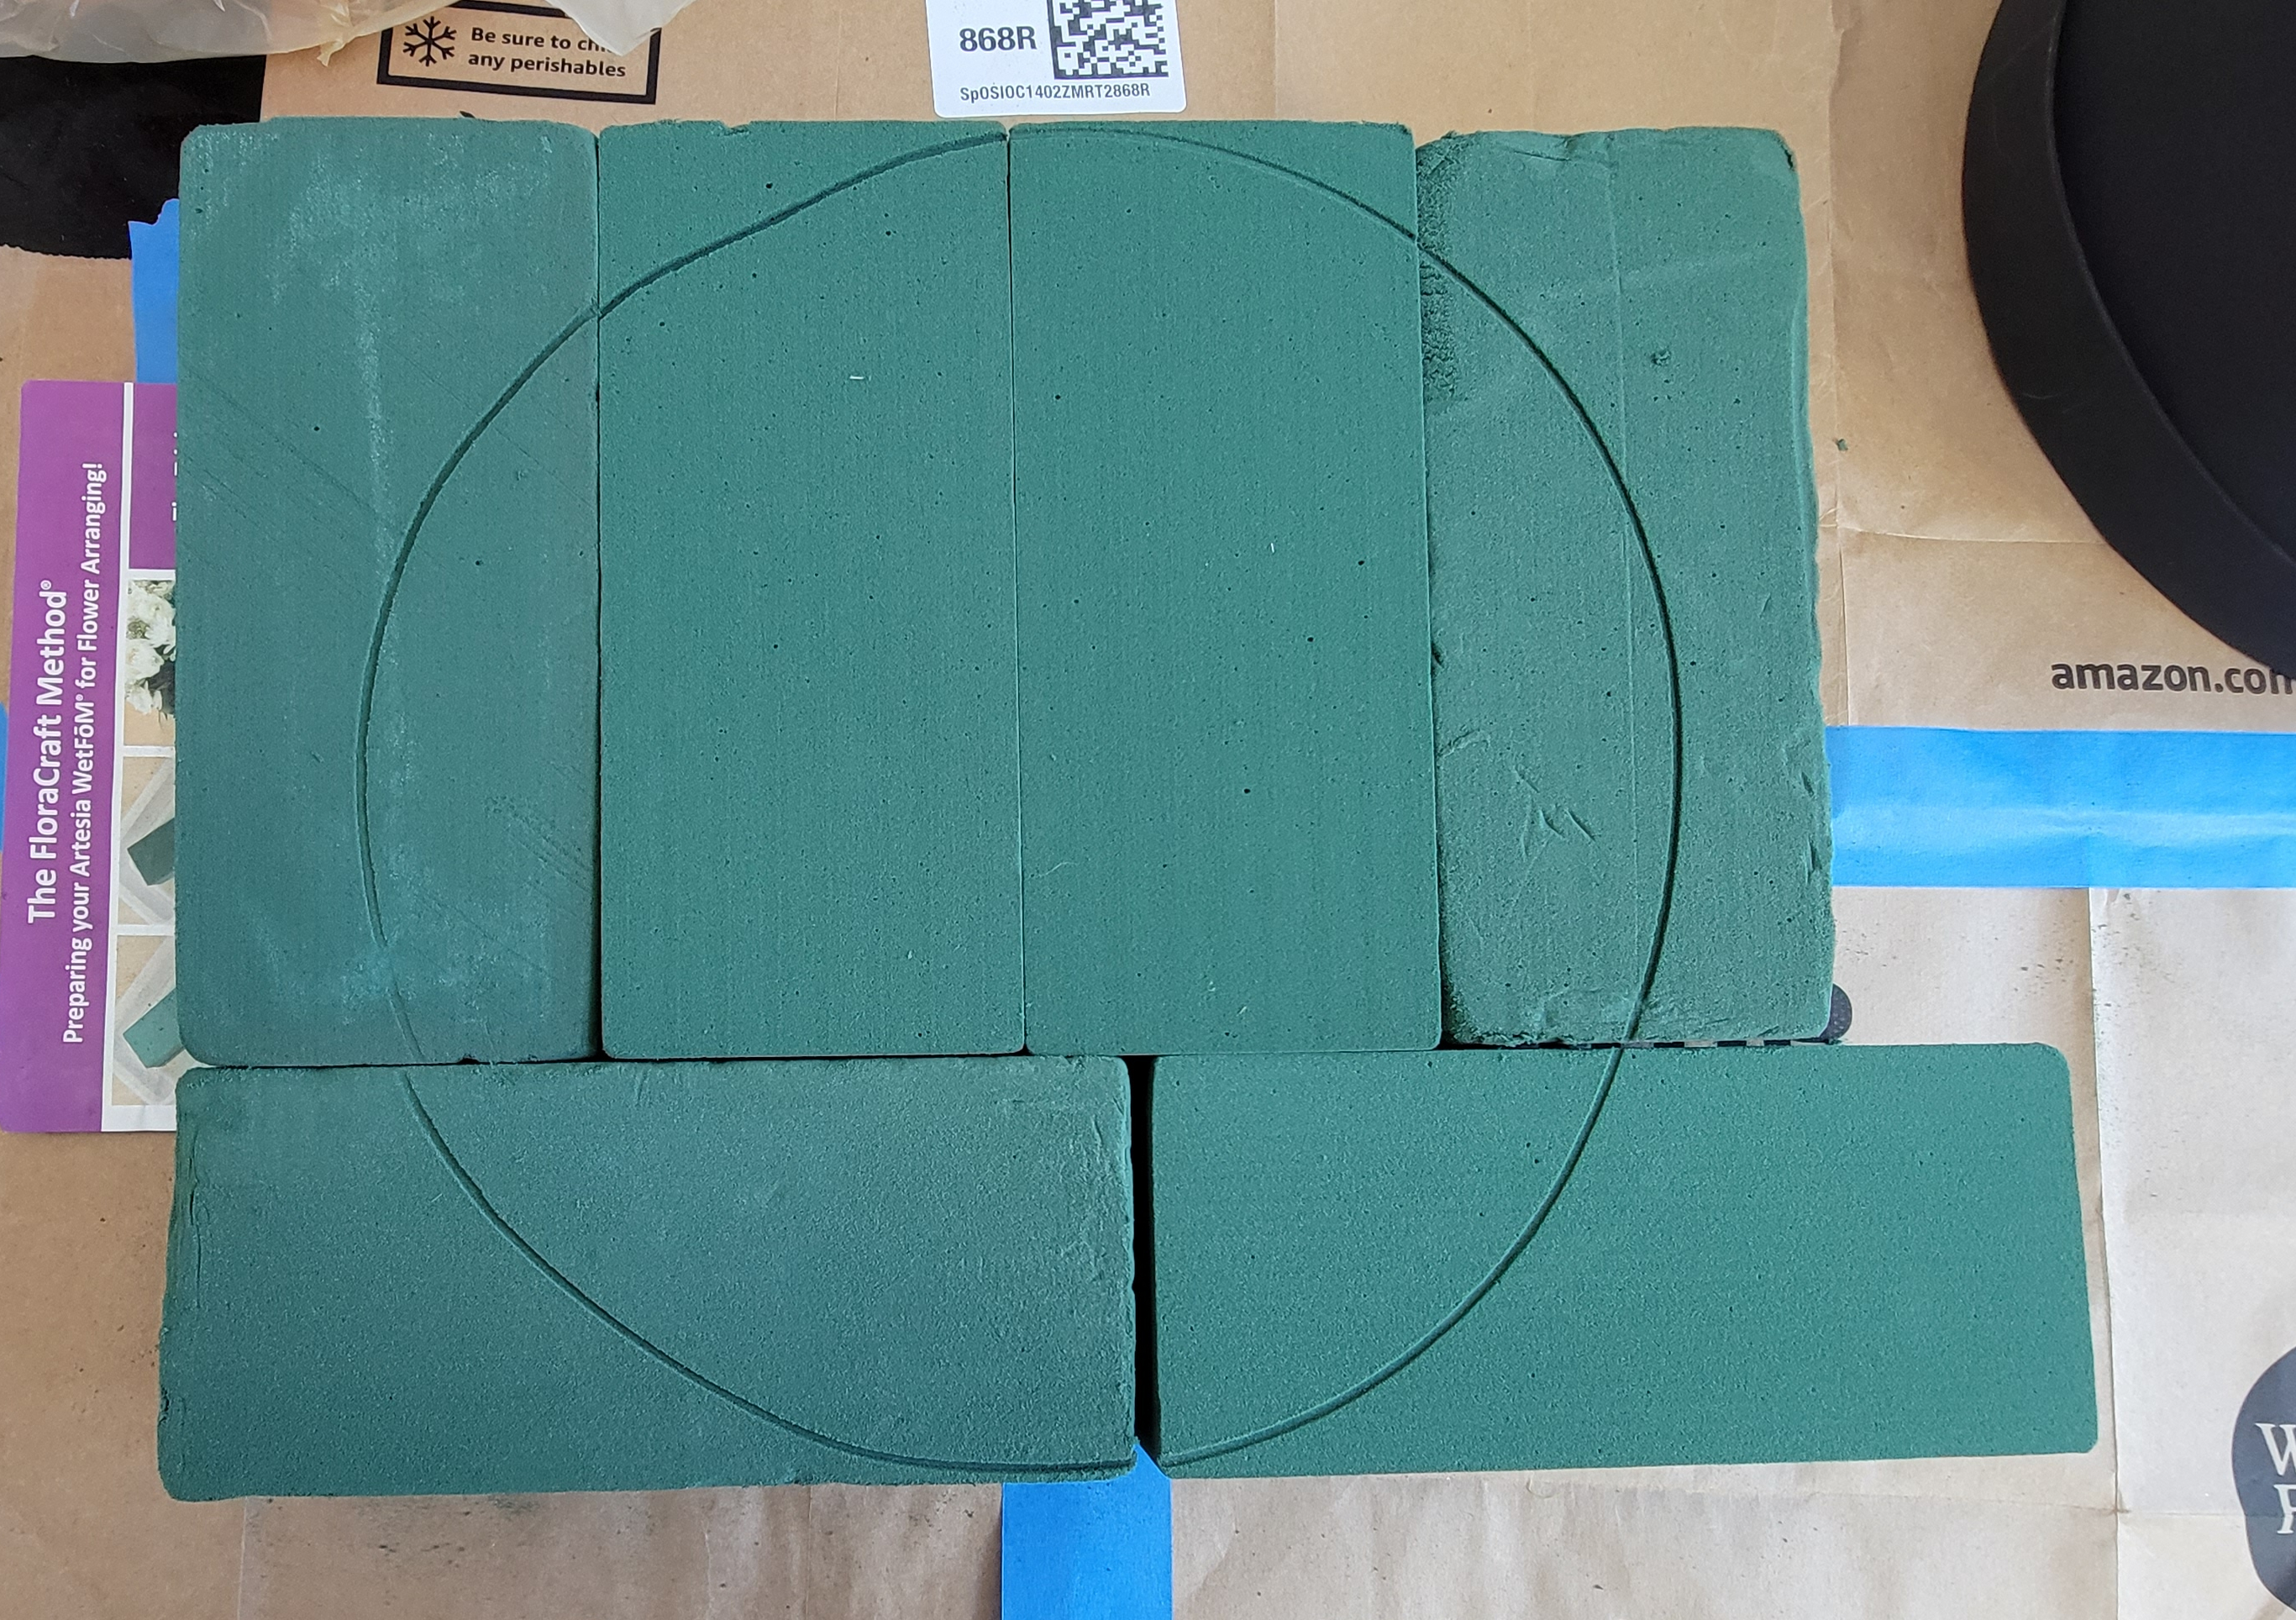
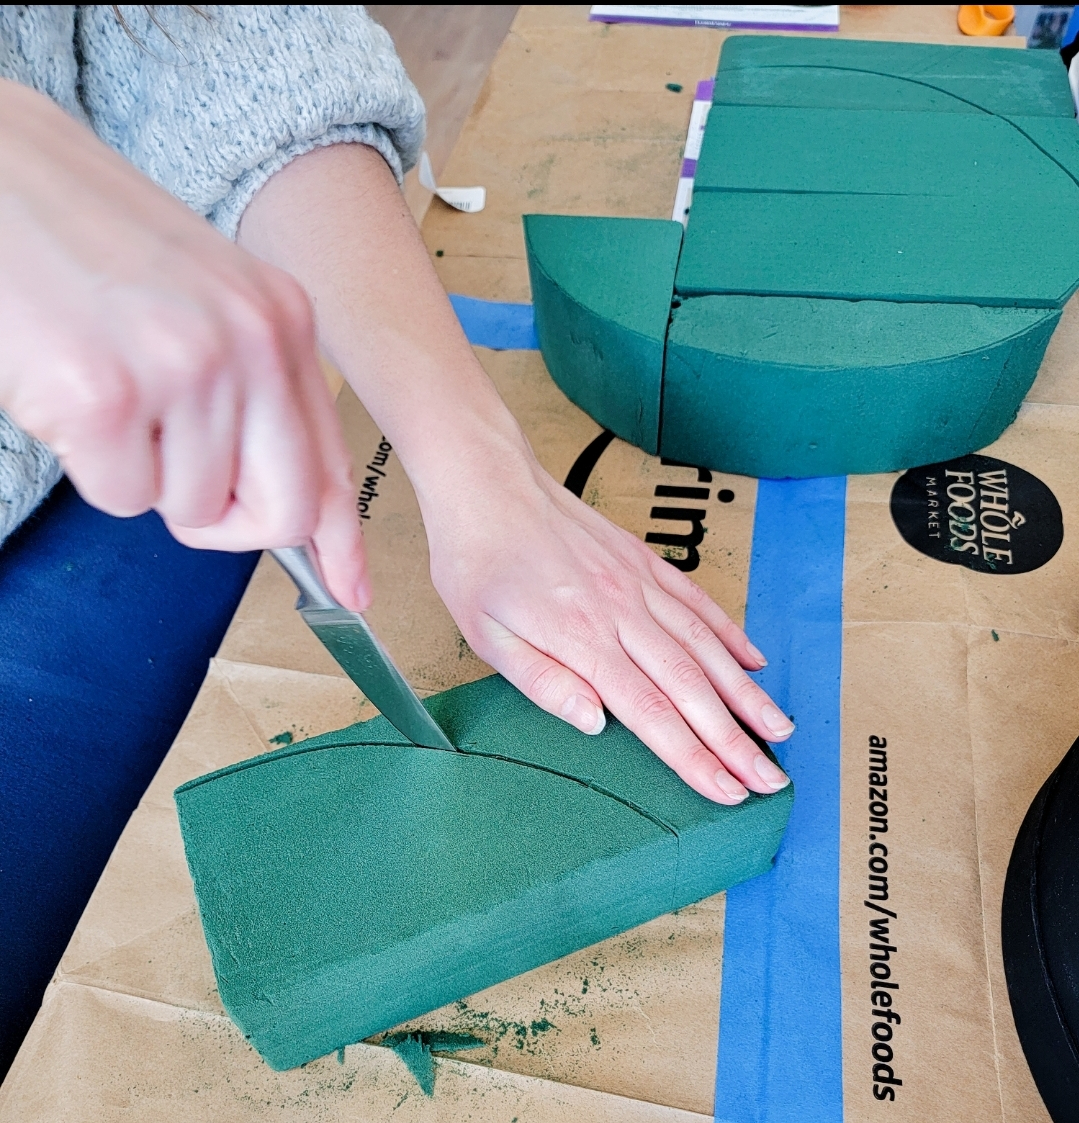
Lay the foam bricks next to each other so the box can sit on top of the bricks without having any part of it fall off the edge. Turn your box upside down on top of the floral foam and mark around the box with a pen, knife, or simply by pressing down on the box to make an indent. Once your foam is marked, start cutting. After the pieces are cut, lay them in your box and shave pieces as necessary. It should fit pretty snug. You may need to shave more off after soaking the floral foam in water but I recommend cutting it dry before soaking.
Step 4: Soak the floral foam. Skip to the fifth step if you are working with dry and artificial foam.
I decided to use artificial flowers so I don’t have a visual aid for you but it’s simple. Set the cut floral foam sections in a bowl of water or the sink and let them soak. It takes time so don’t rush the process. Besides, the creative part is about to begin in the next step.
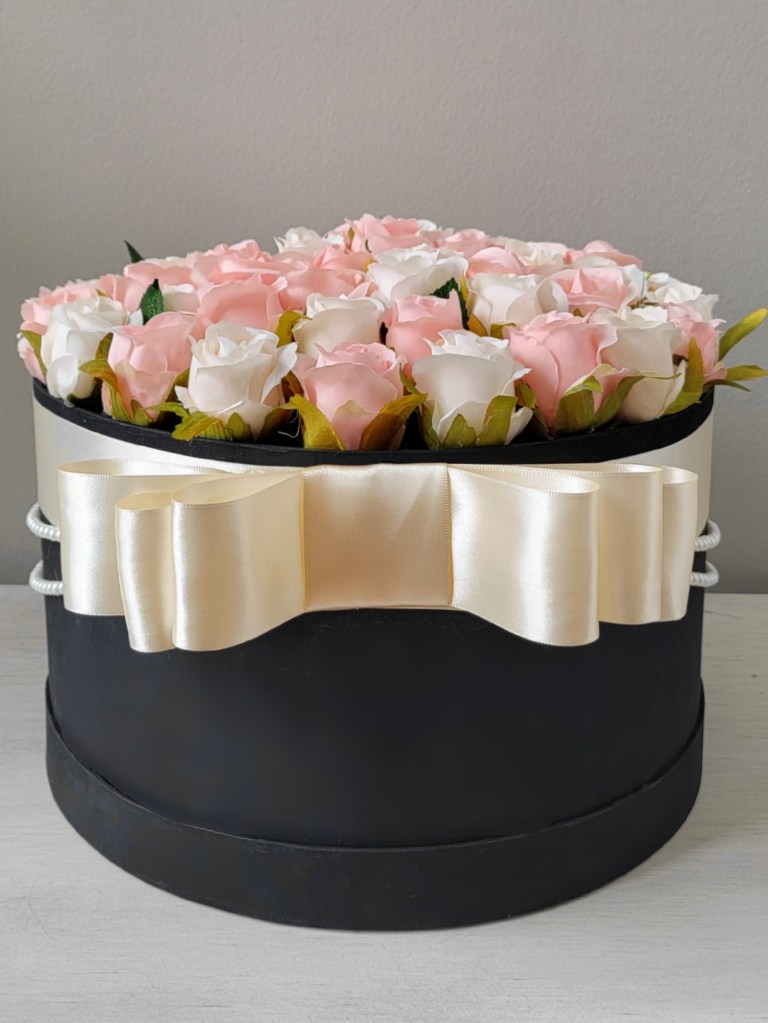
Step 5: Decorate the outside. Note: I forgot to take pictures of this step so don’t panic when you see the flowers and foam inside the box already.

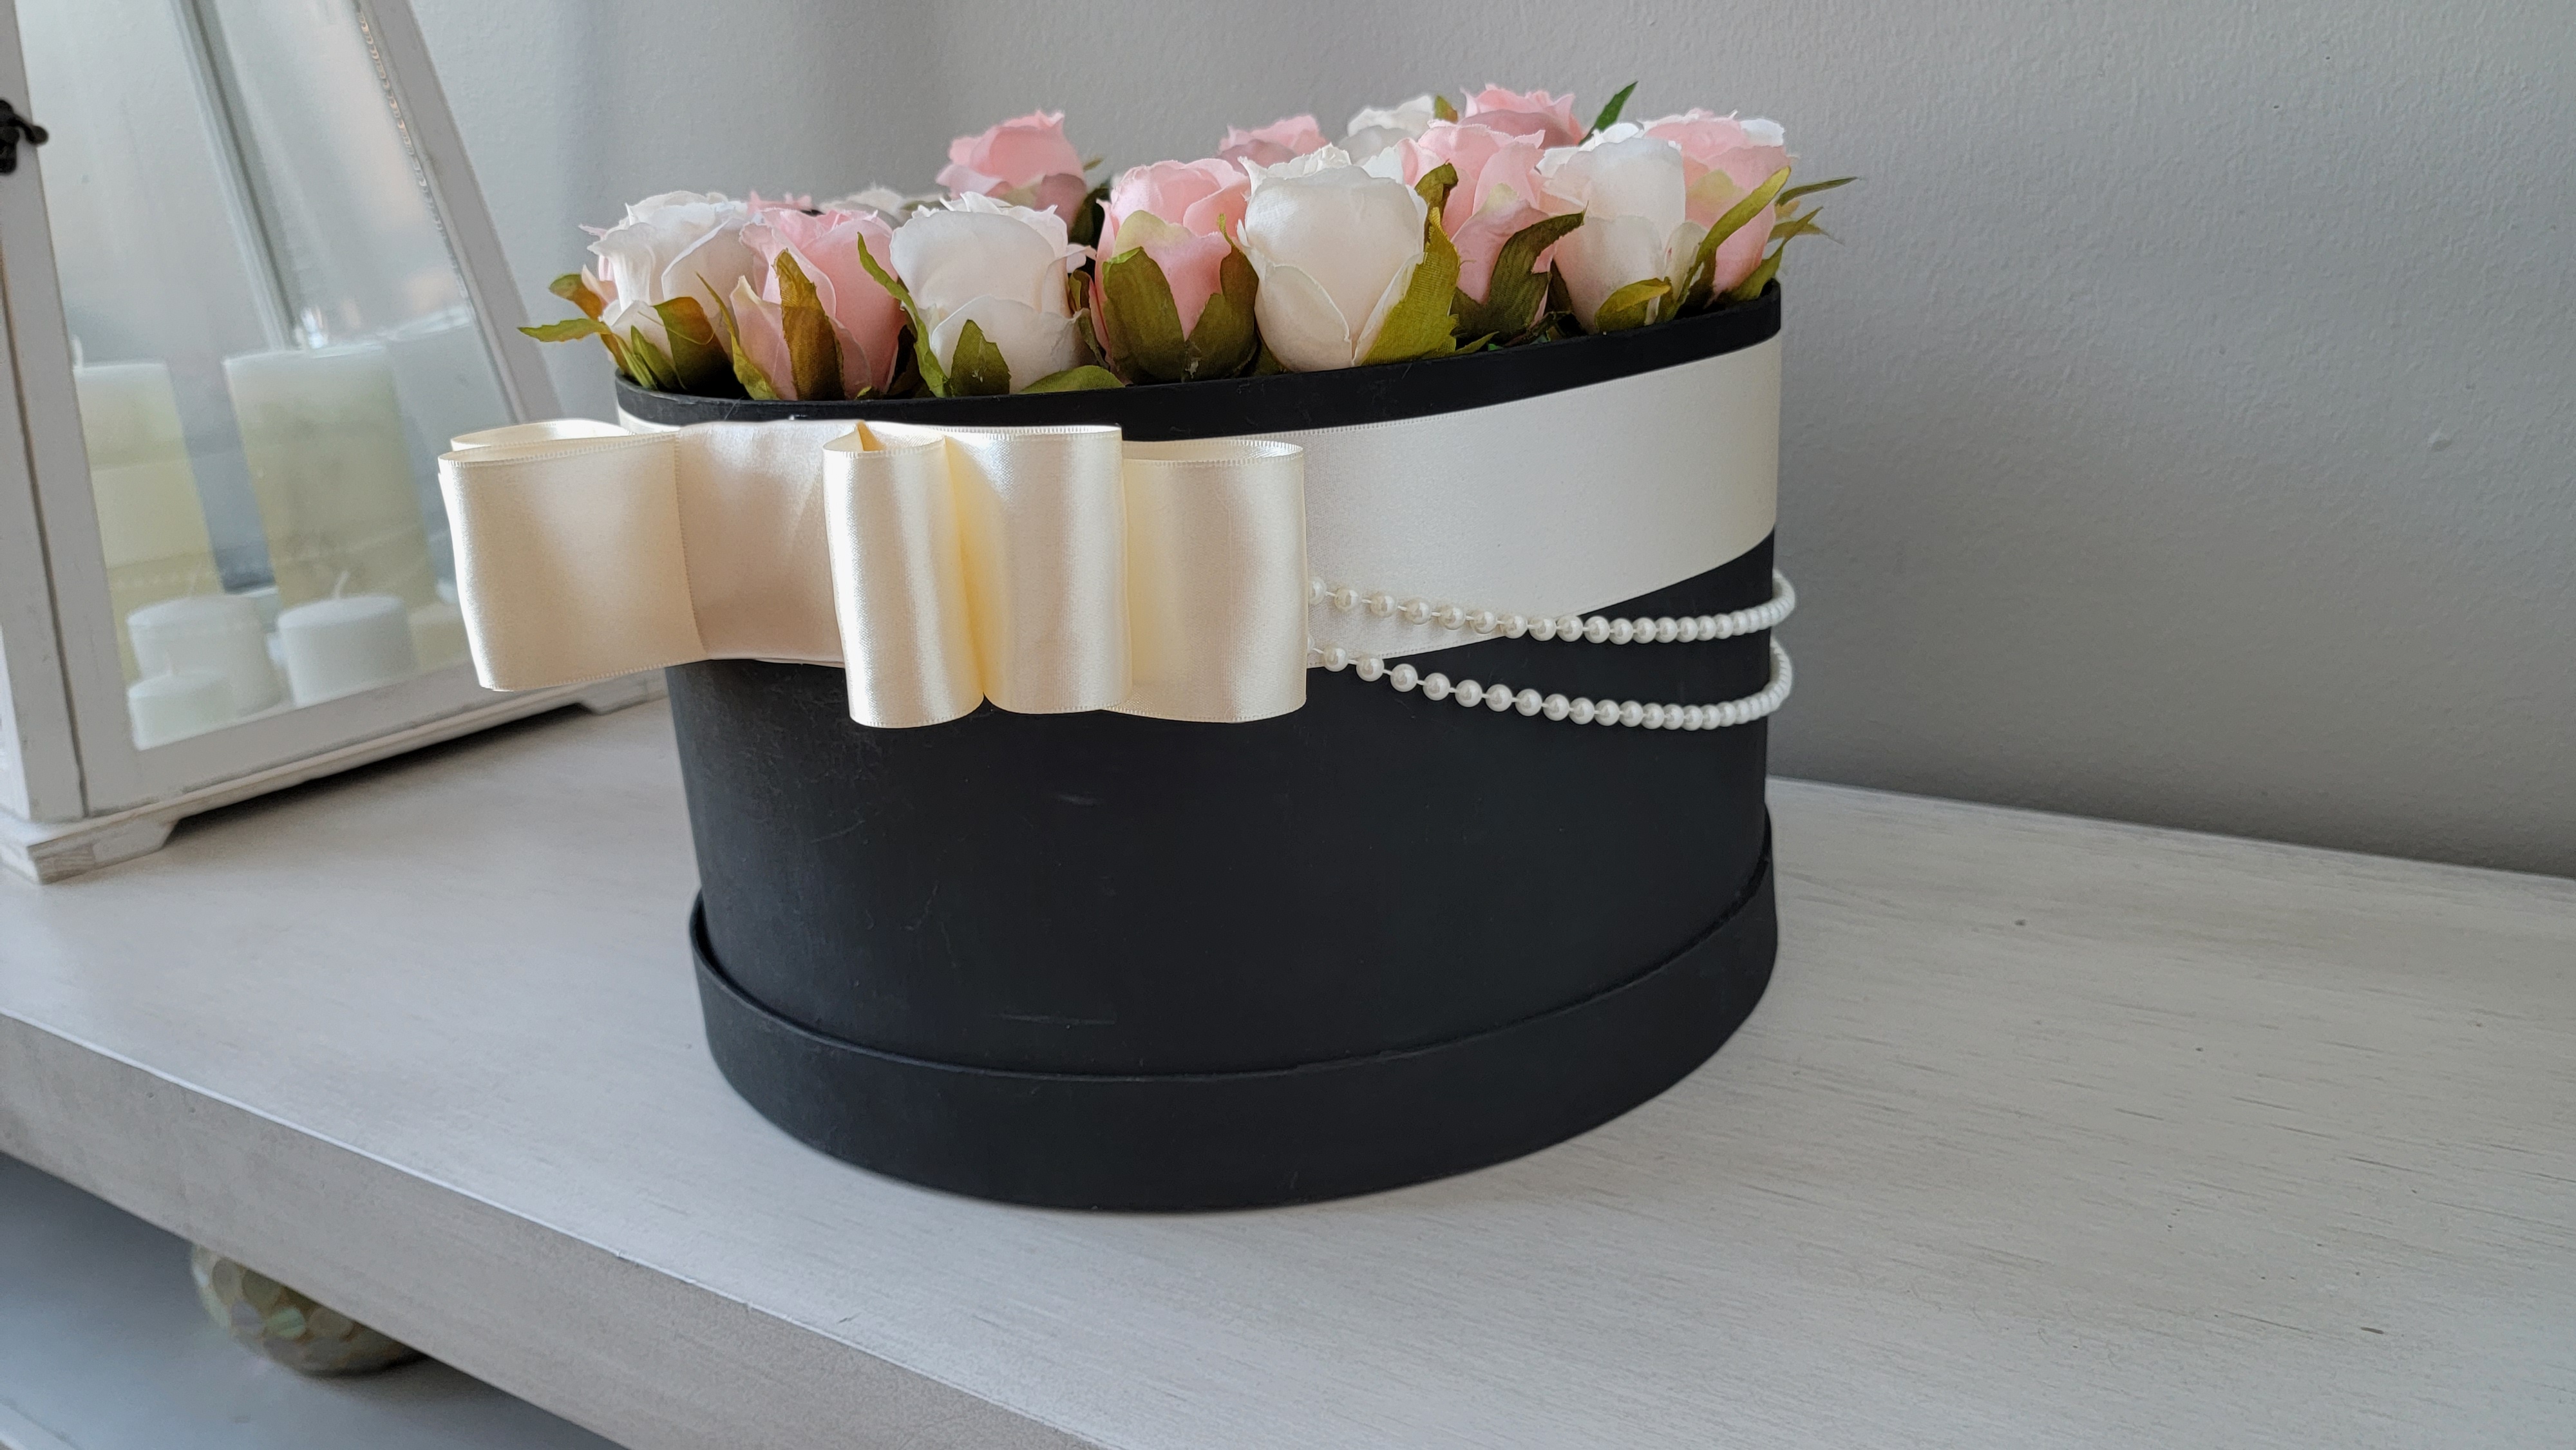
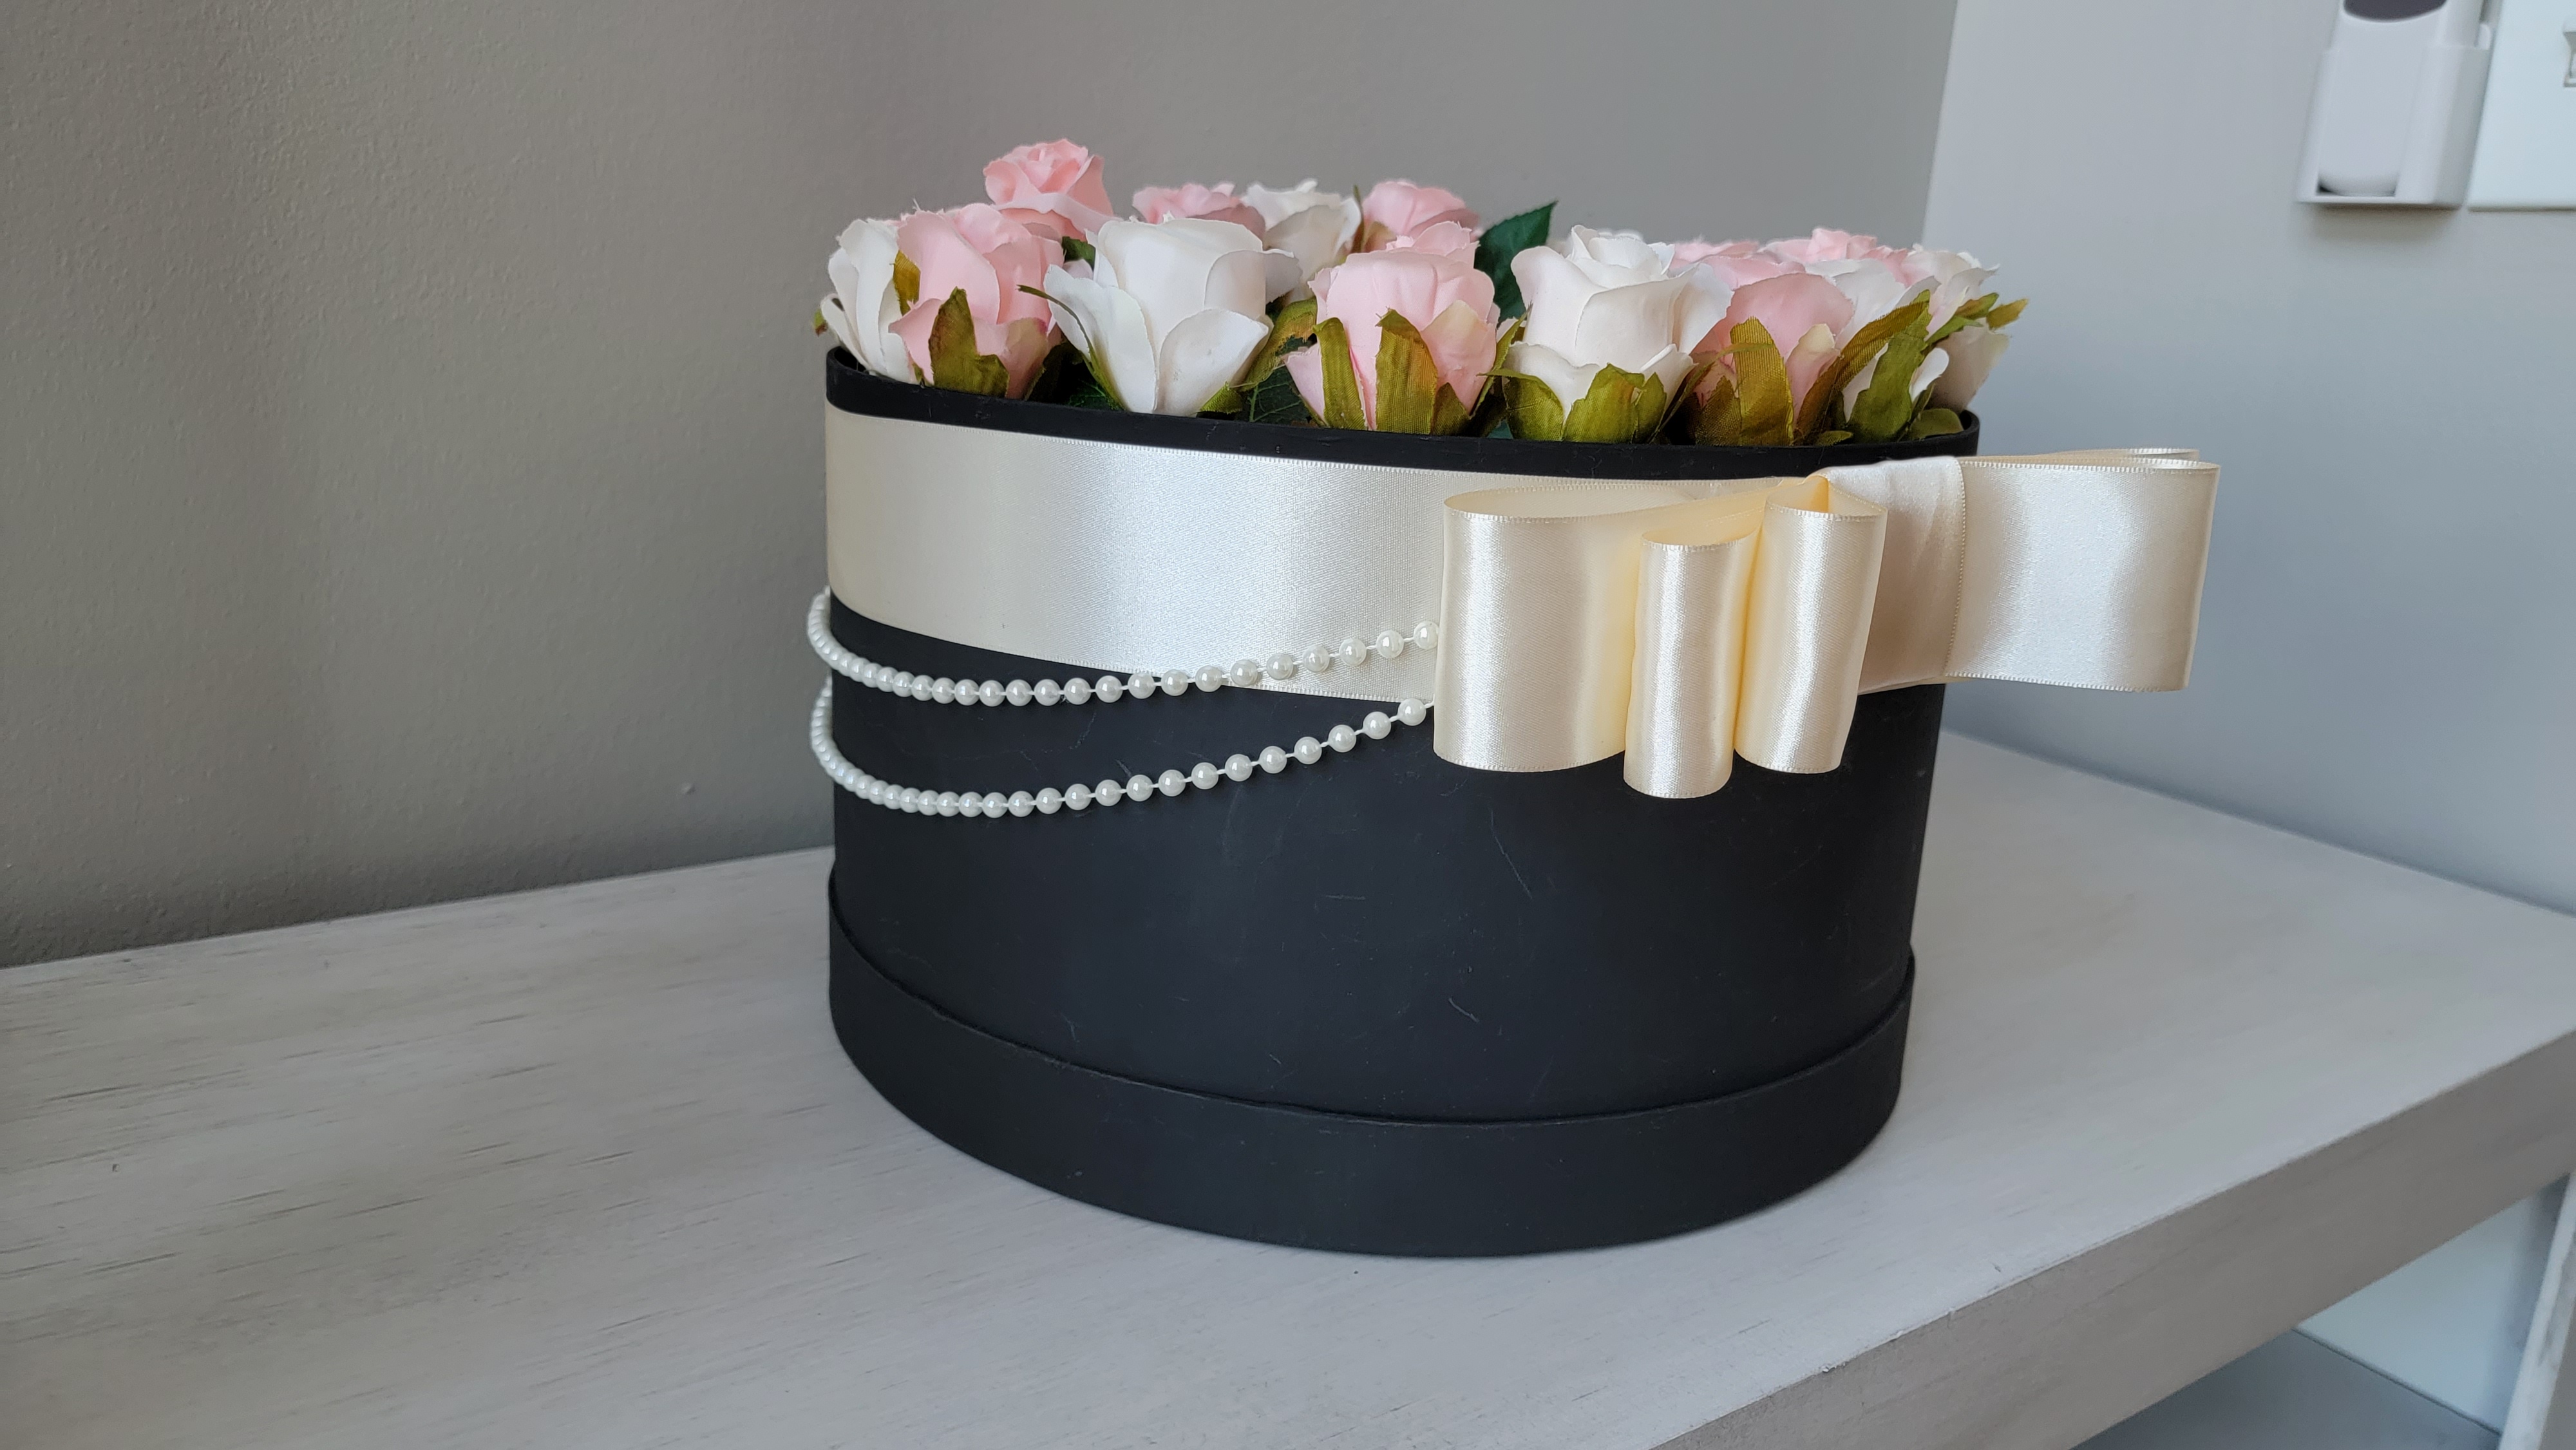
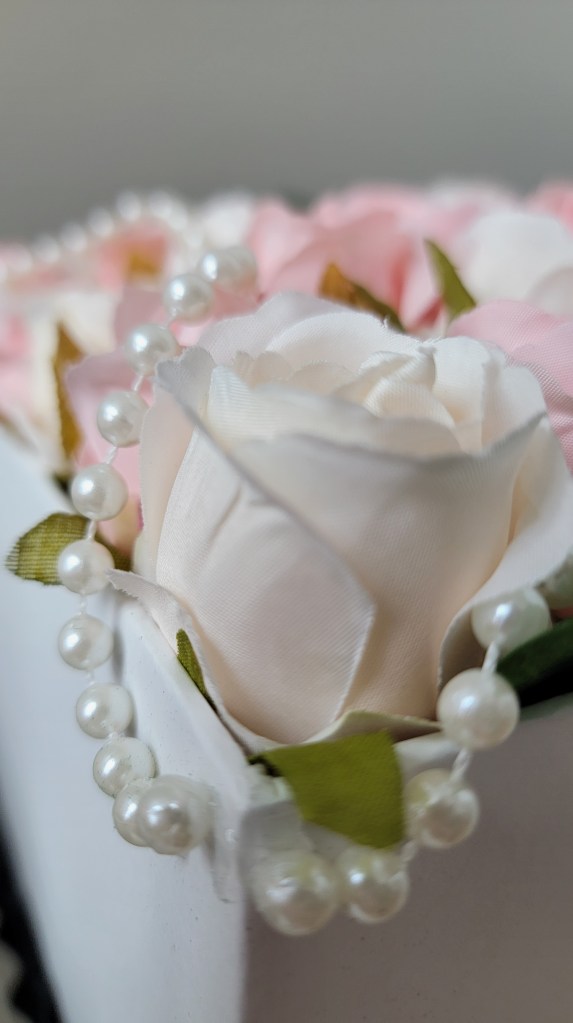
Once the hot glue is ready you can decorate the outside of the box. I kept it minimal with a beige-colored ribbon and white pearls for my decorations but you can style it any way you wish! Pinterest has lots of great ideas–as if you didn’t know that already. Try searching “luxury flower boxes” and you’ll have more ideas than you’ll know what to do with. Once you have placed the final touch, make sure you give the glue and decorations enough time to set before moving the box around too much.
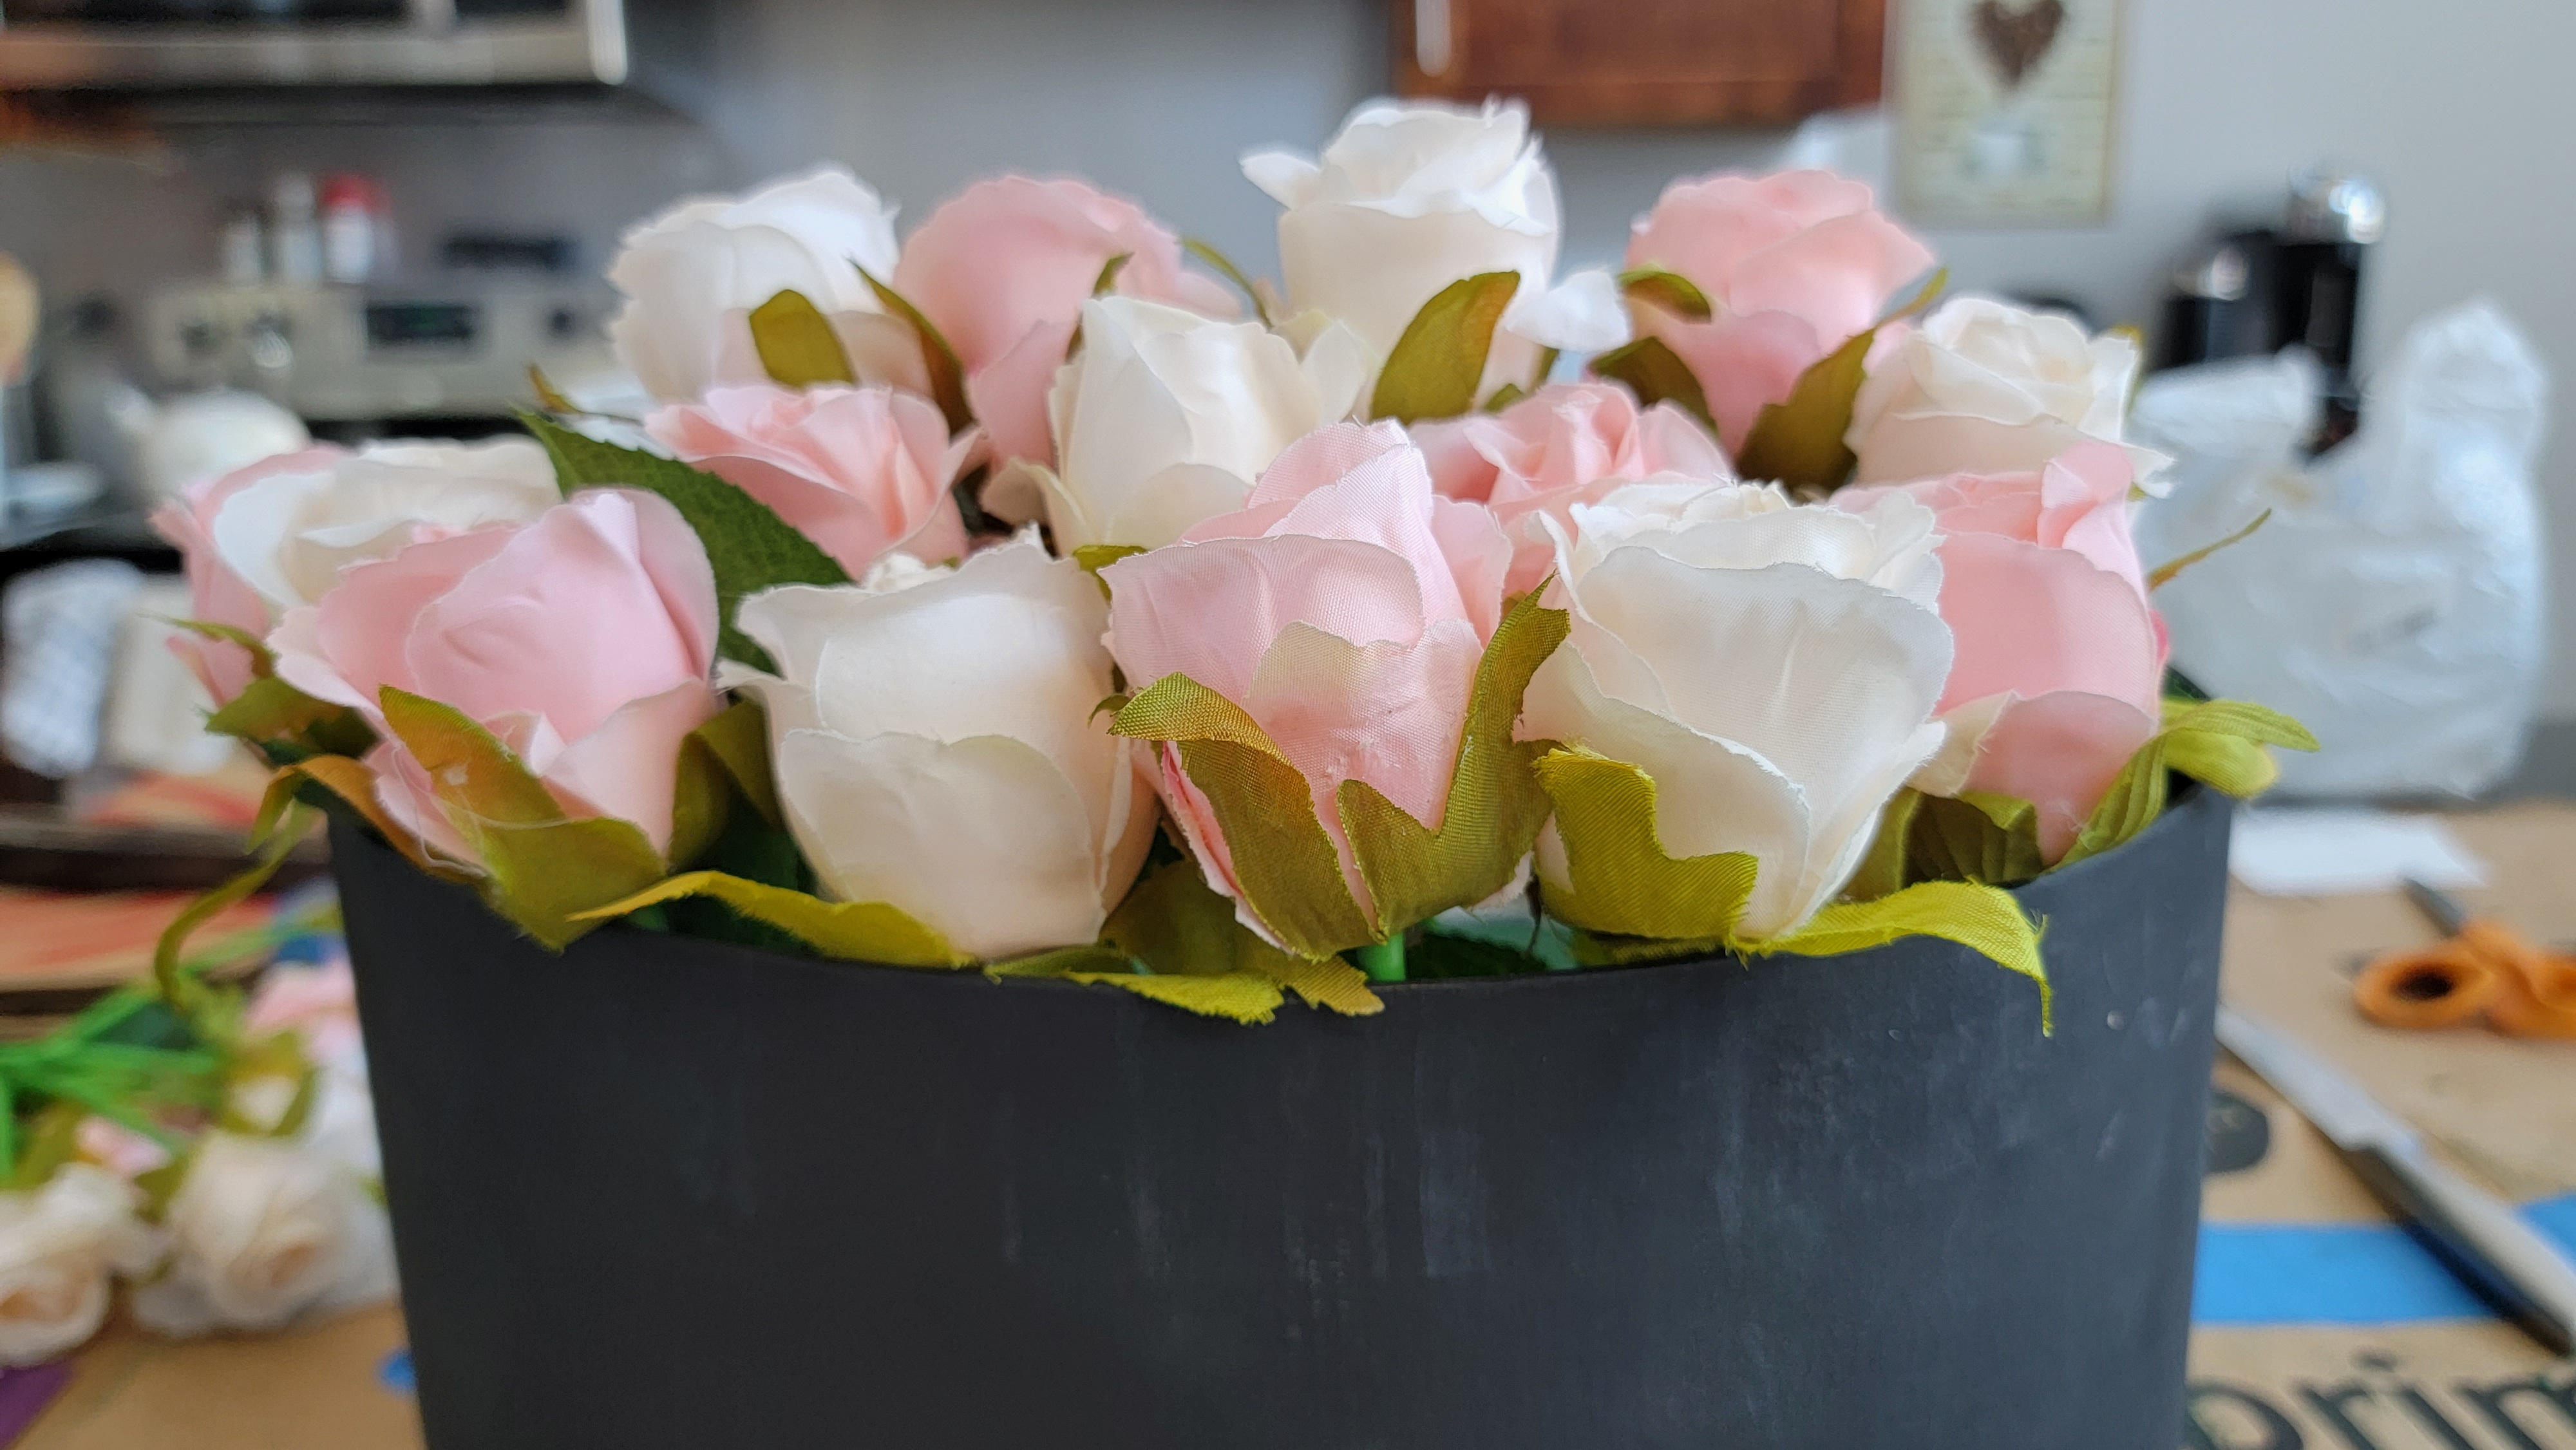
Step 6: Prep your flowers.
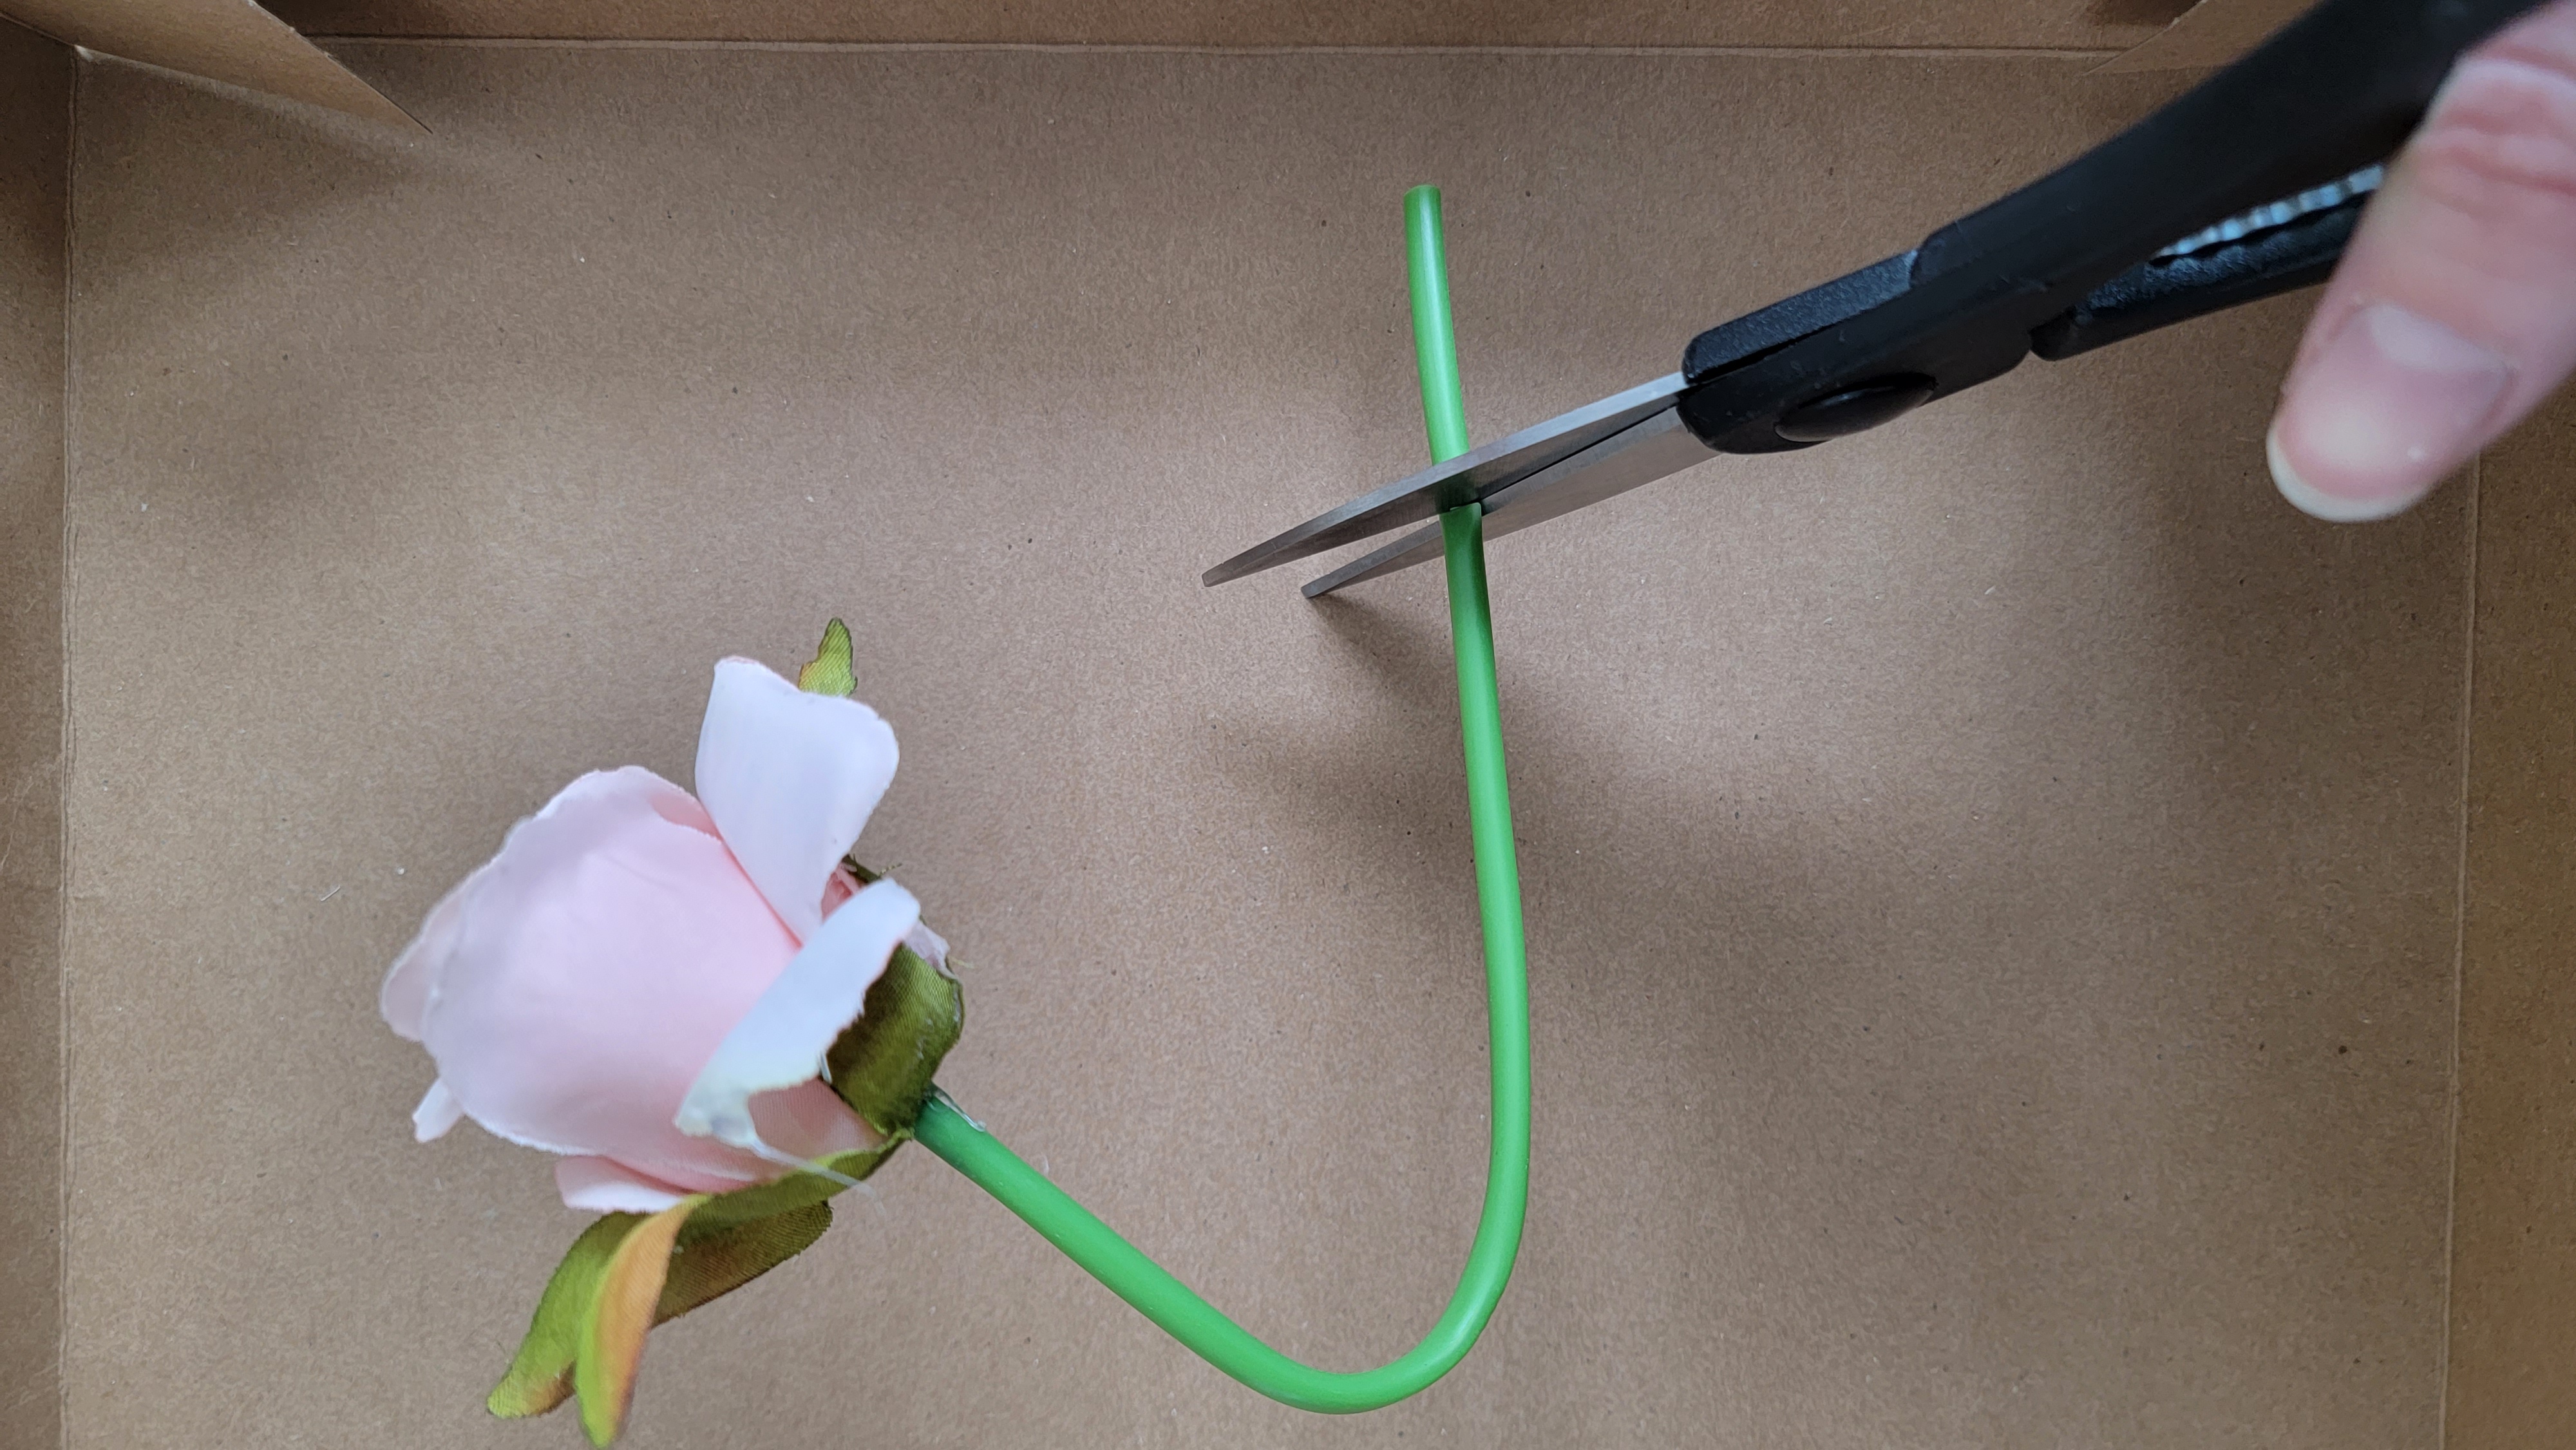


Artificial flowers or not, it’s time to measure the stem lengths. I started by standing one flower outside of the box and bending the artificial flower until I found a height that I liked. I aimed for a height where the bud barely sat above the rim. For longer stems or real flowers, have your box near the edge of the flat table you are using. Hold the flower to the side of the table and you can measure where you want to cut the stem that way (example in the third picture above).
Once you have a stem trimmed, you can use a ruler to make more precise cuts on all the other stems. Keep in mind, the stems need to stick in the foam for stability. It’s easy to cut the stems too short so be aware. I decided to keep my stems mostly all the same length and I eyeballed most of them. Flowers aren’t uniform after all. Another idea I saw on Pinterest was making each row of flowers higher as you go to the center. It was a nice tiered look and is another option to consider. I accidentally incorporated a slight tier system to my box but it turned out really nice.
Step 7: Foam it up. Skip to step 8 if your dry foam is already set in the box.
Once all the stems are cut, you are ready to start arranging. Take your dry floral foam, if you haven’t already, or wet floral foam (for real flowers) and set them in the box snuggly so there aren’t large gaps. It won’t look pretty but the bottom doesn’t have to be; that’s what the flowers are for.
Note: Make sure you have your lining in the bottom and sides of the box if you are using wet foam!
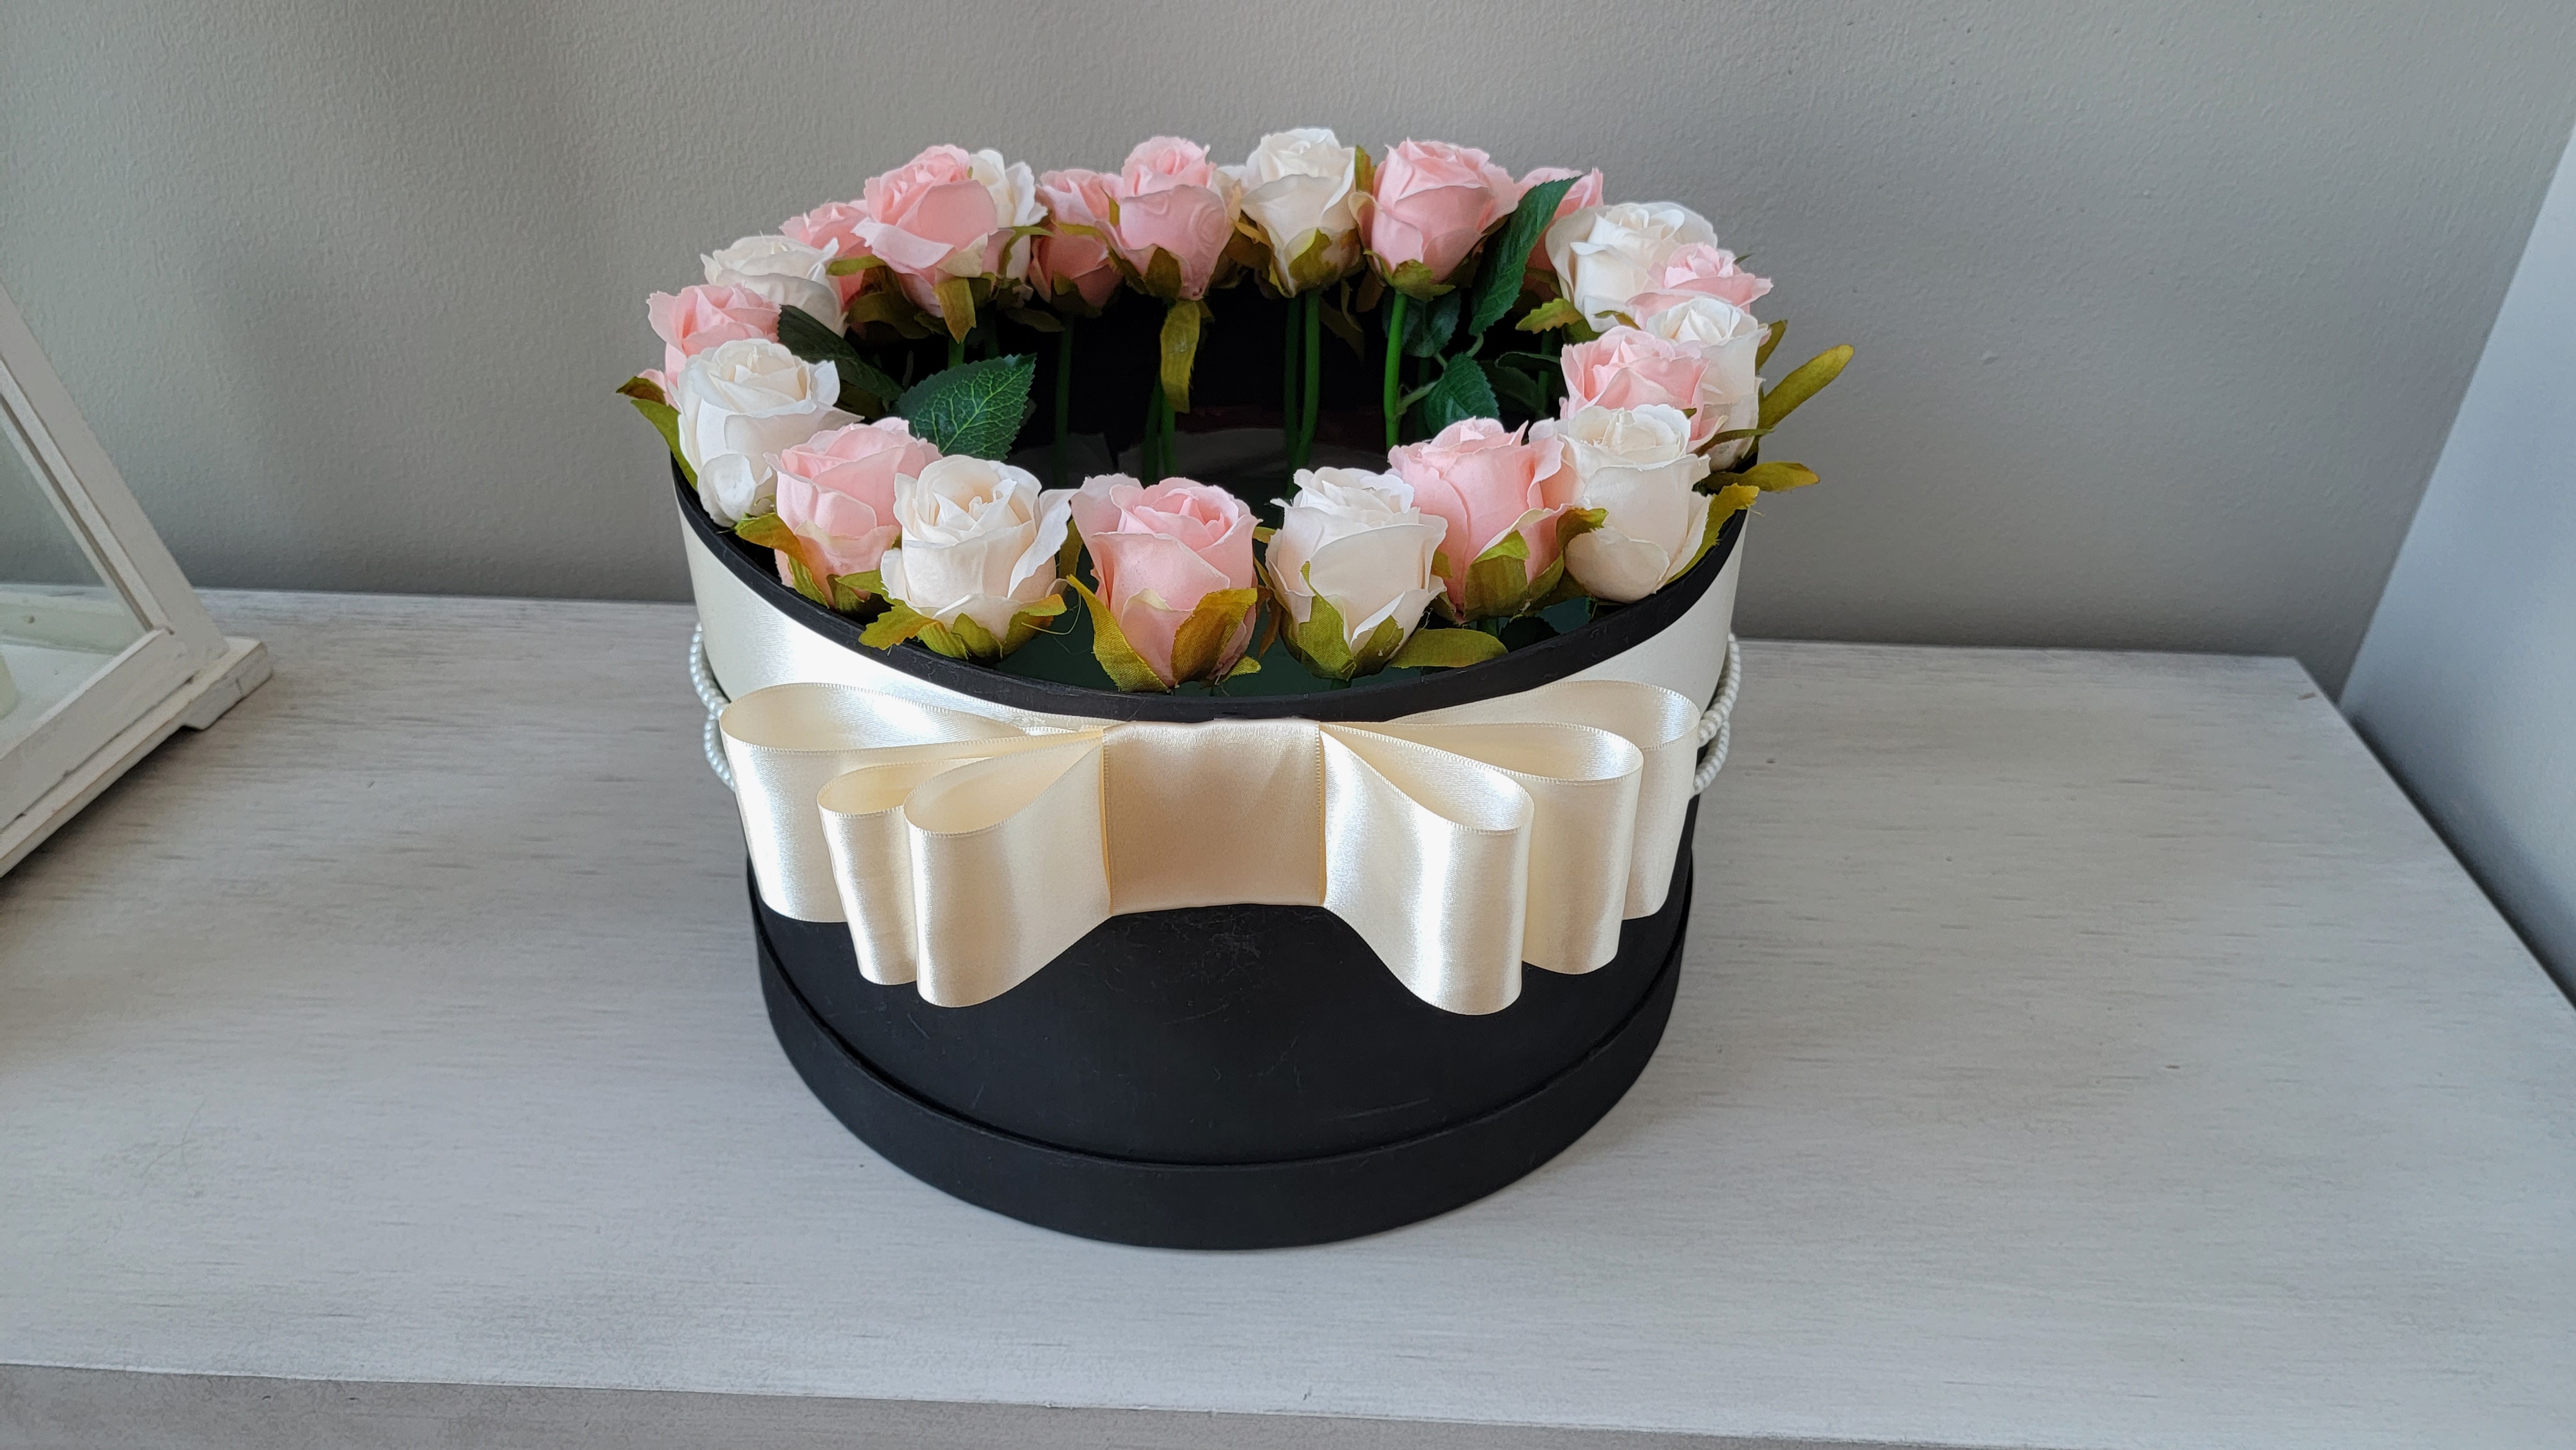
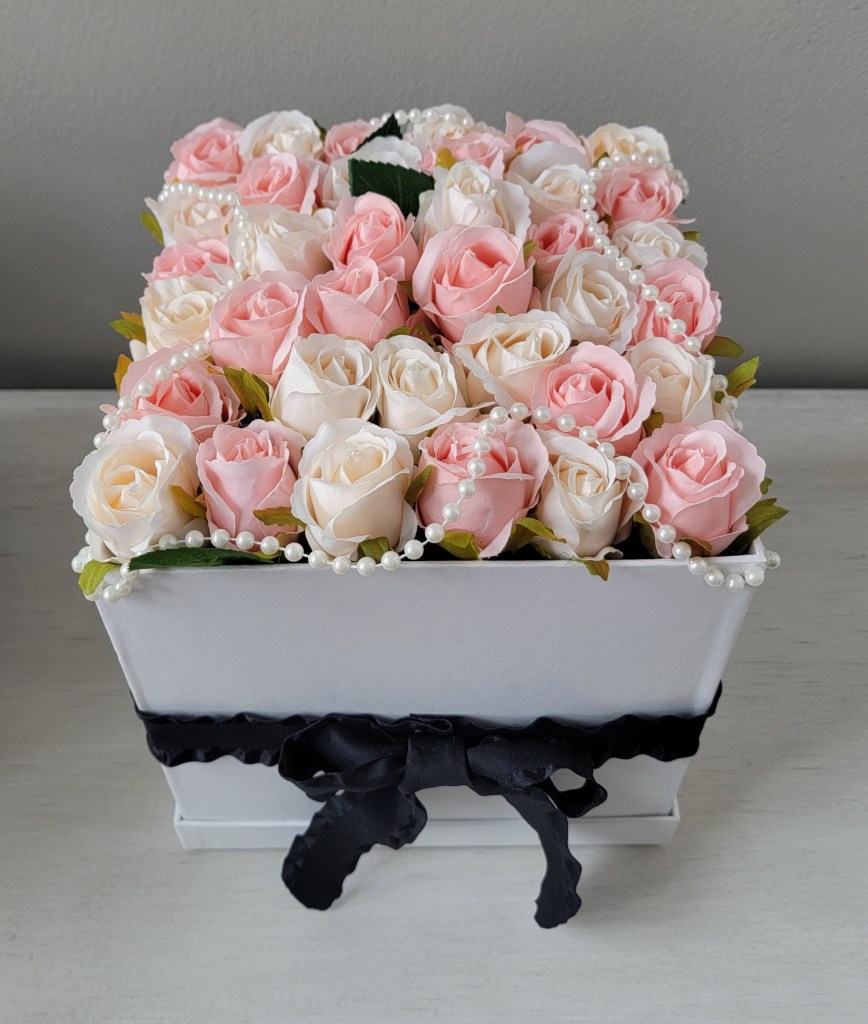
Step 8: Place your precut flowers in the foam.
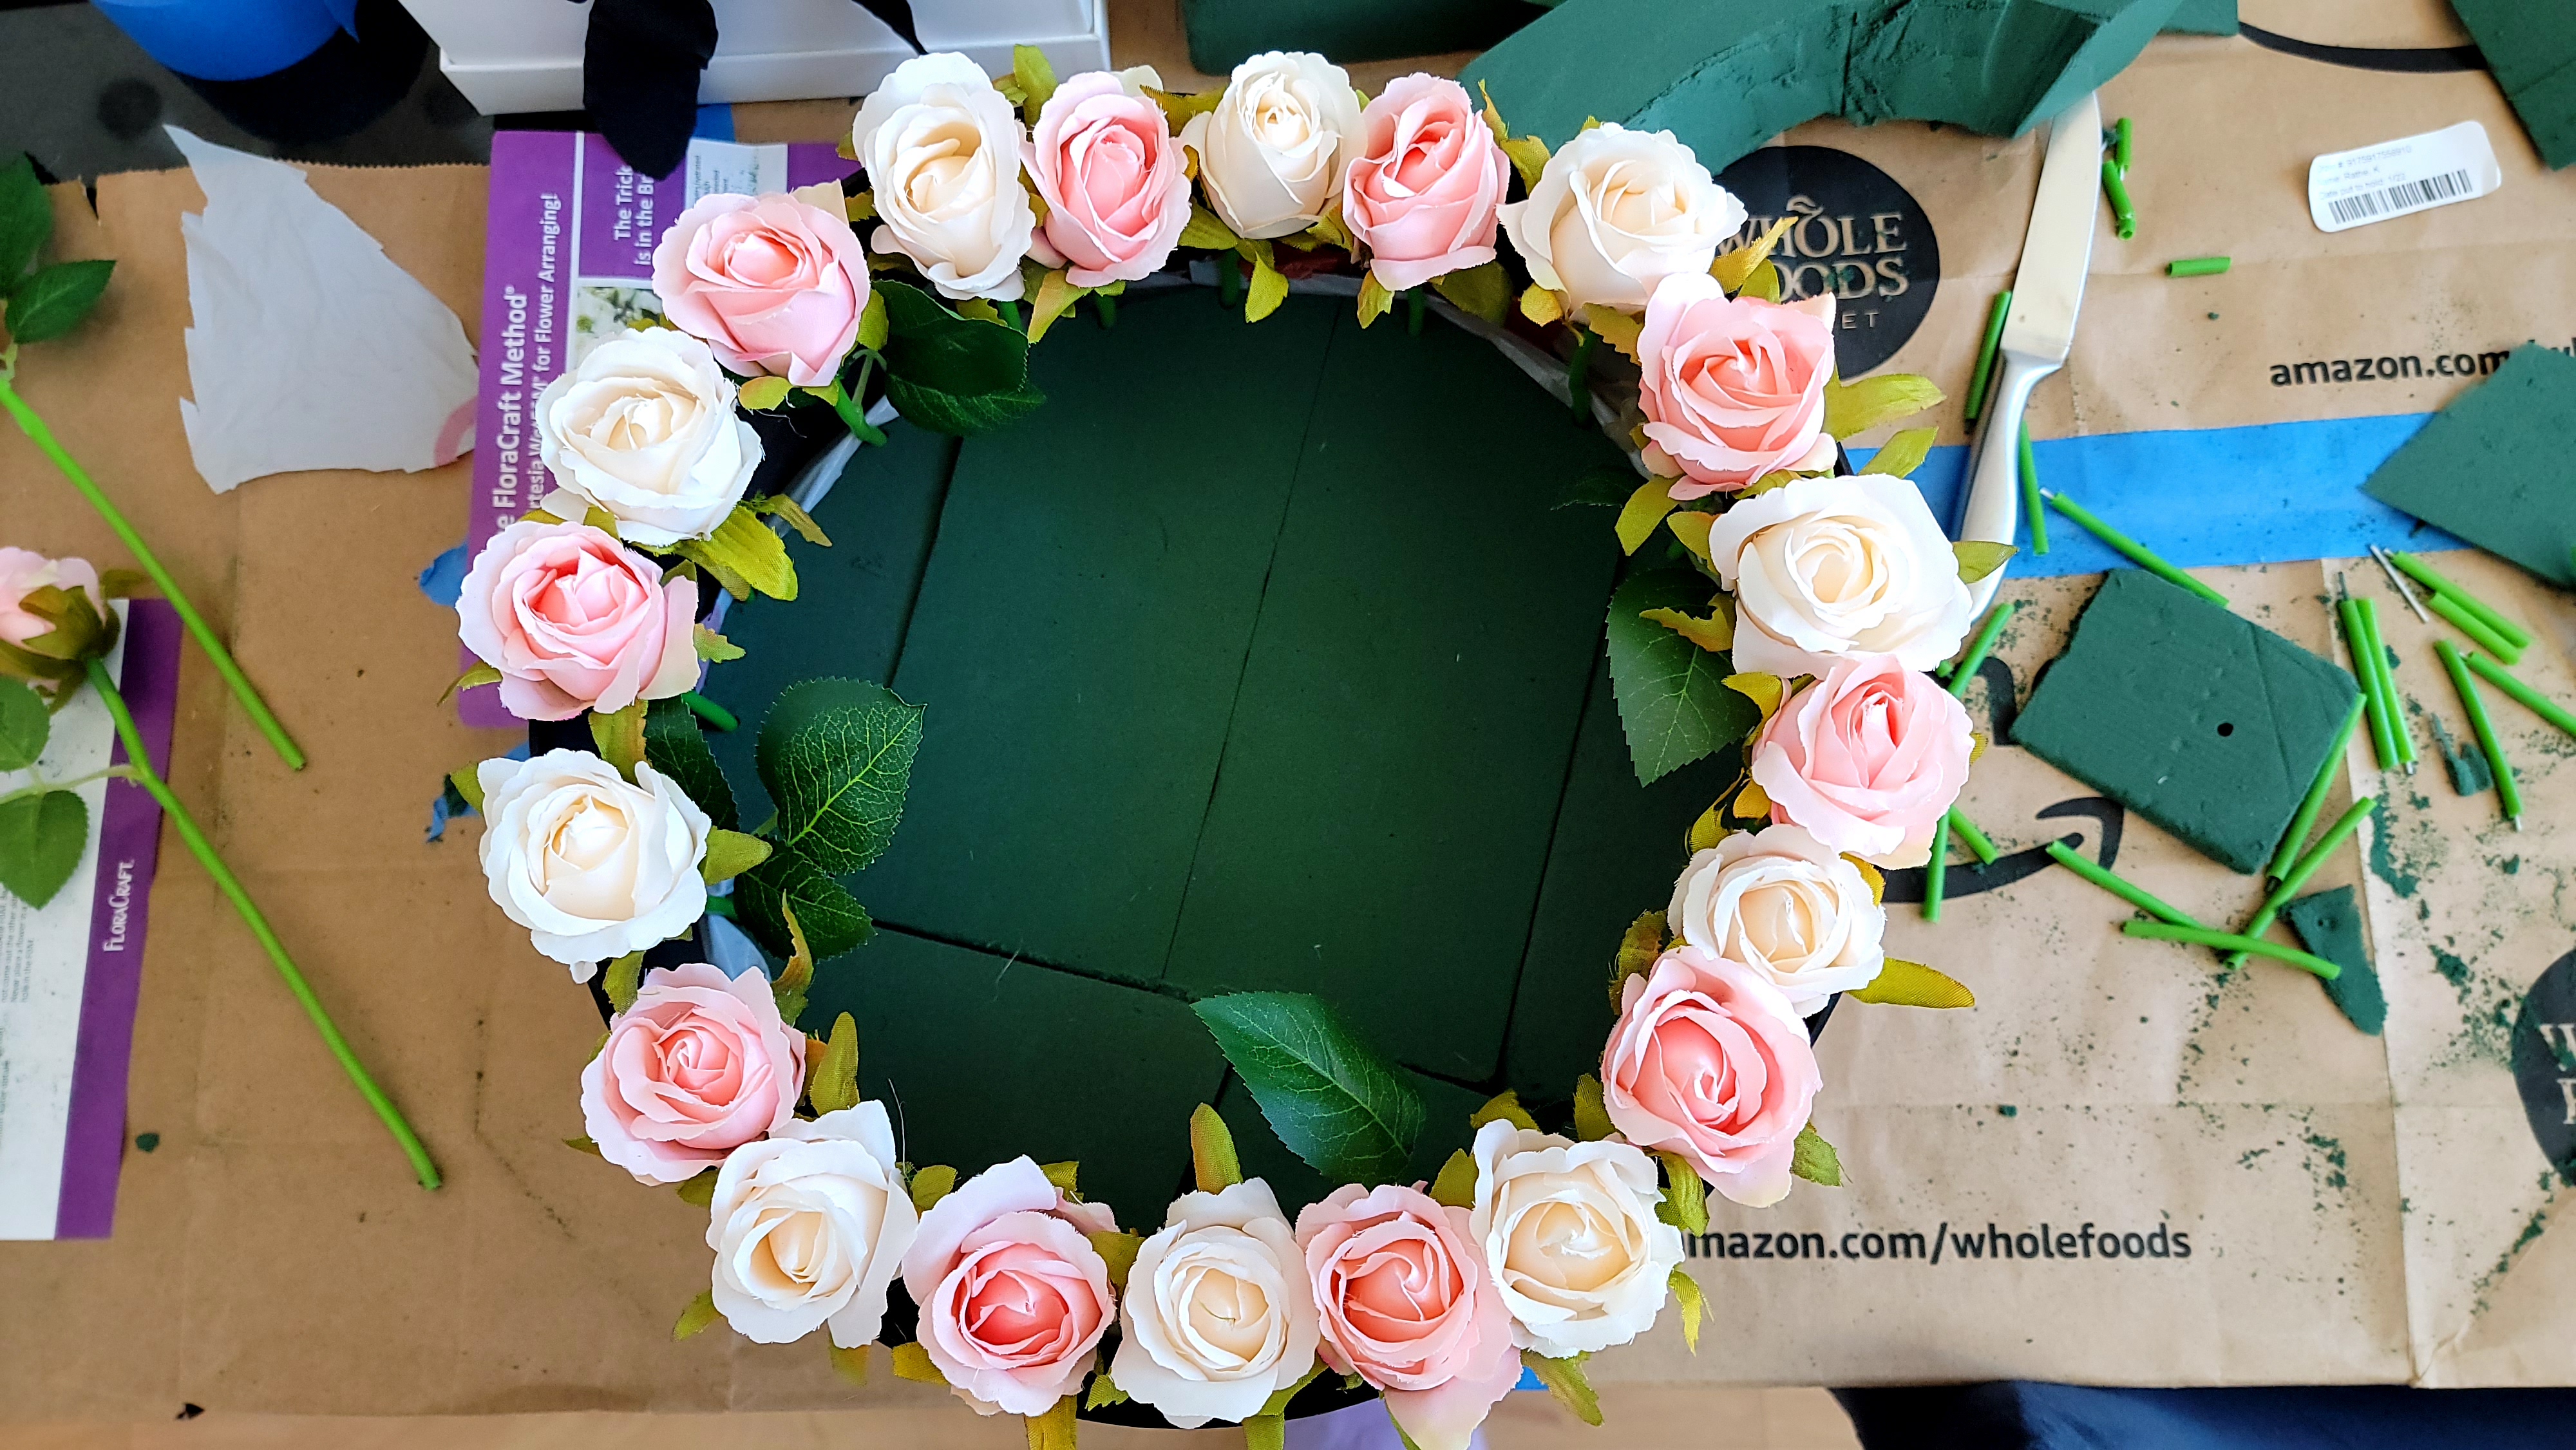
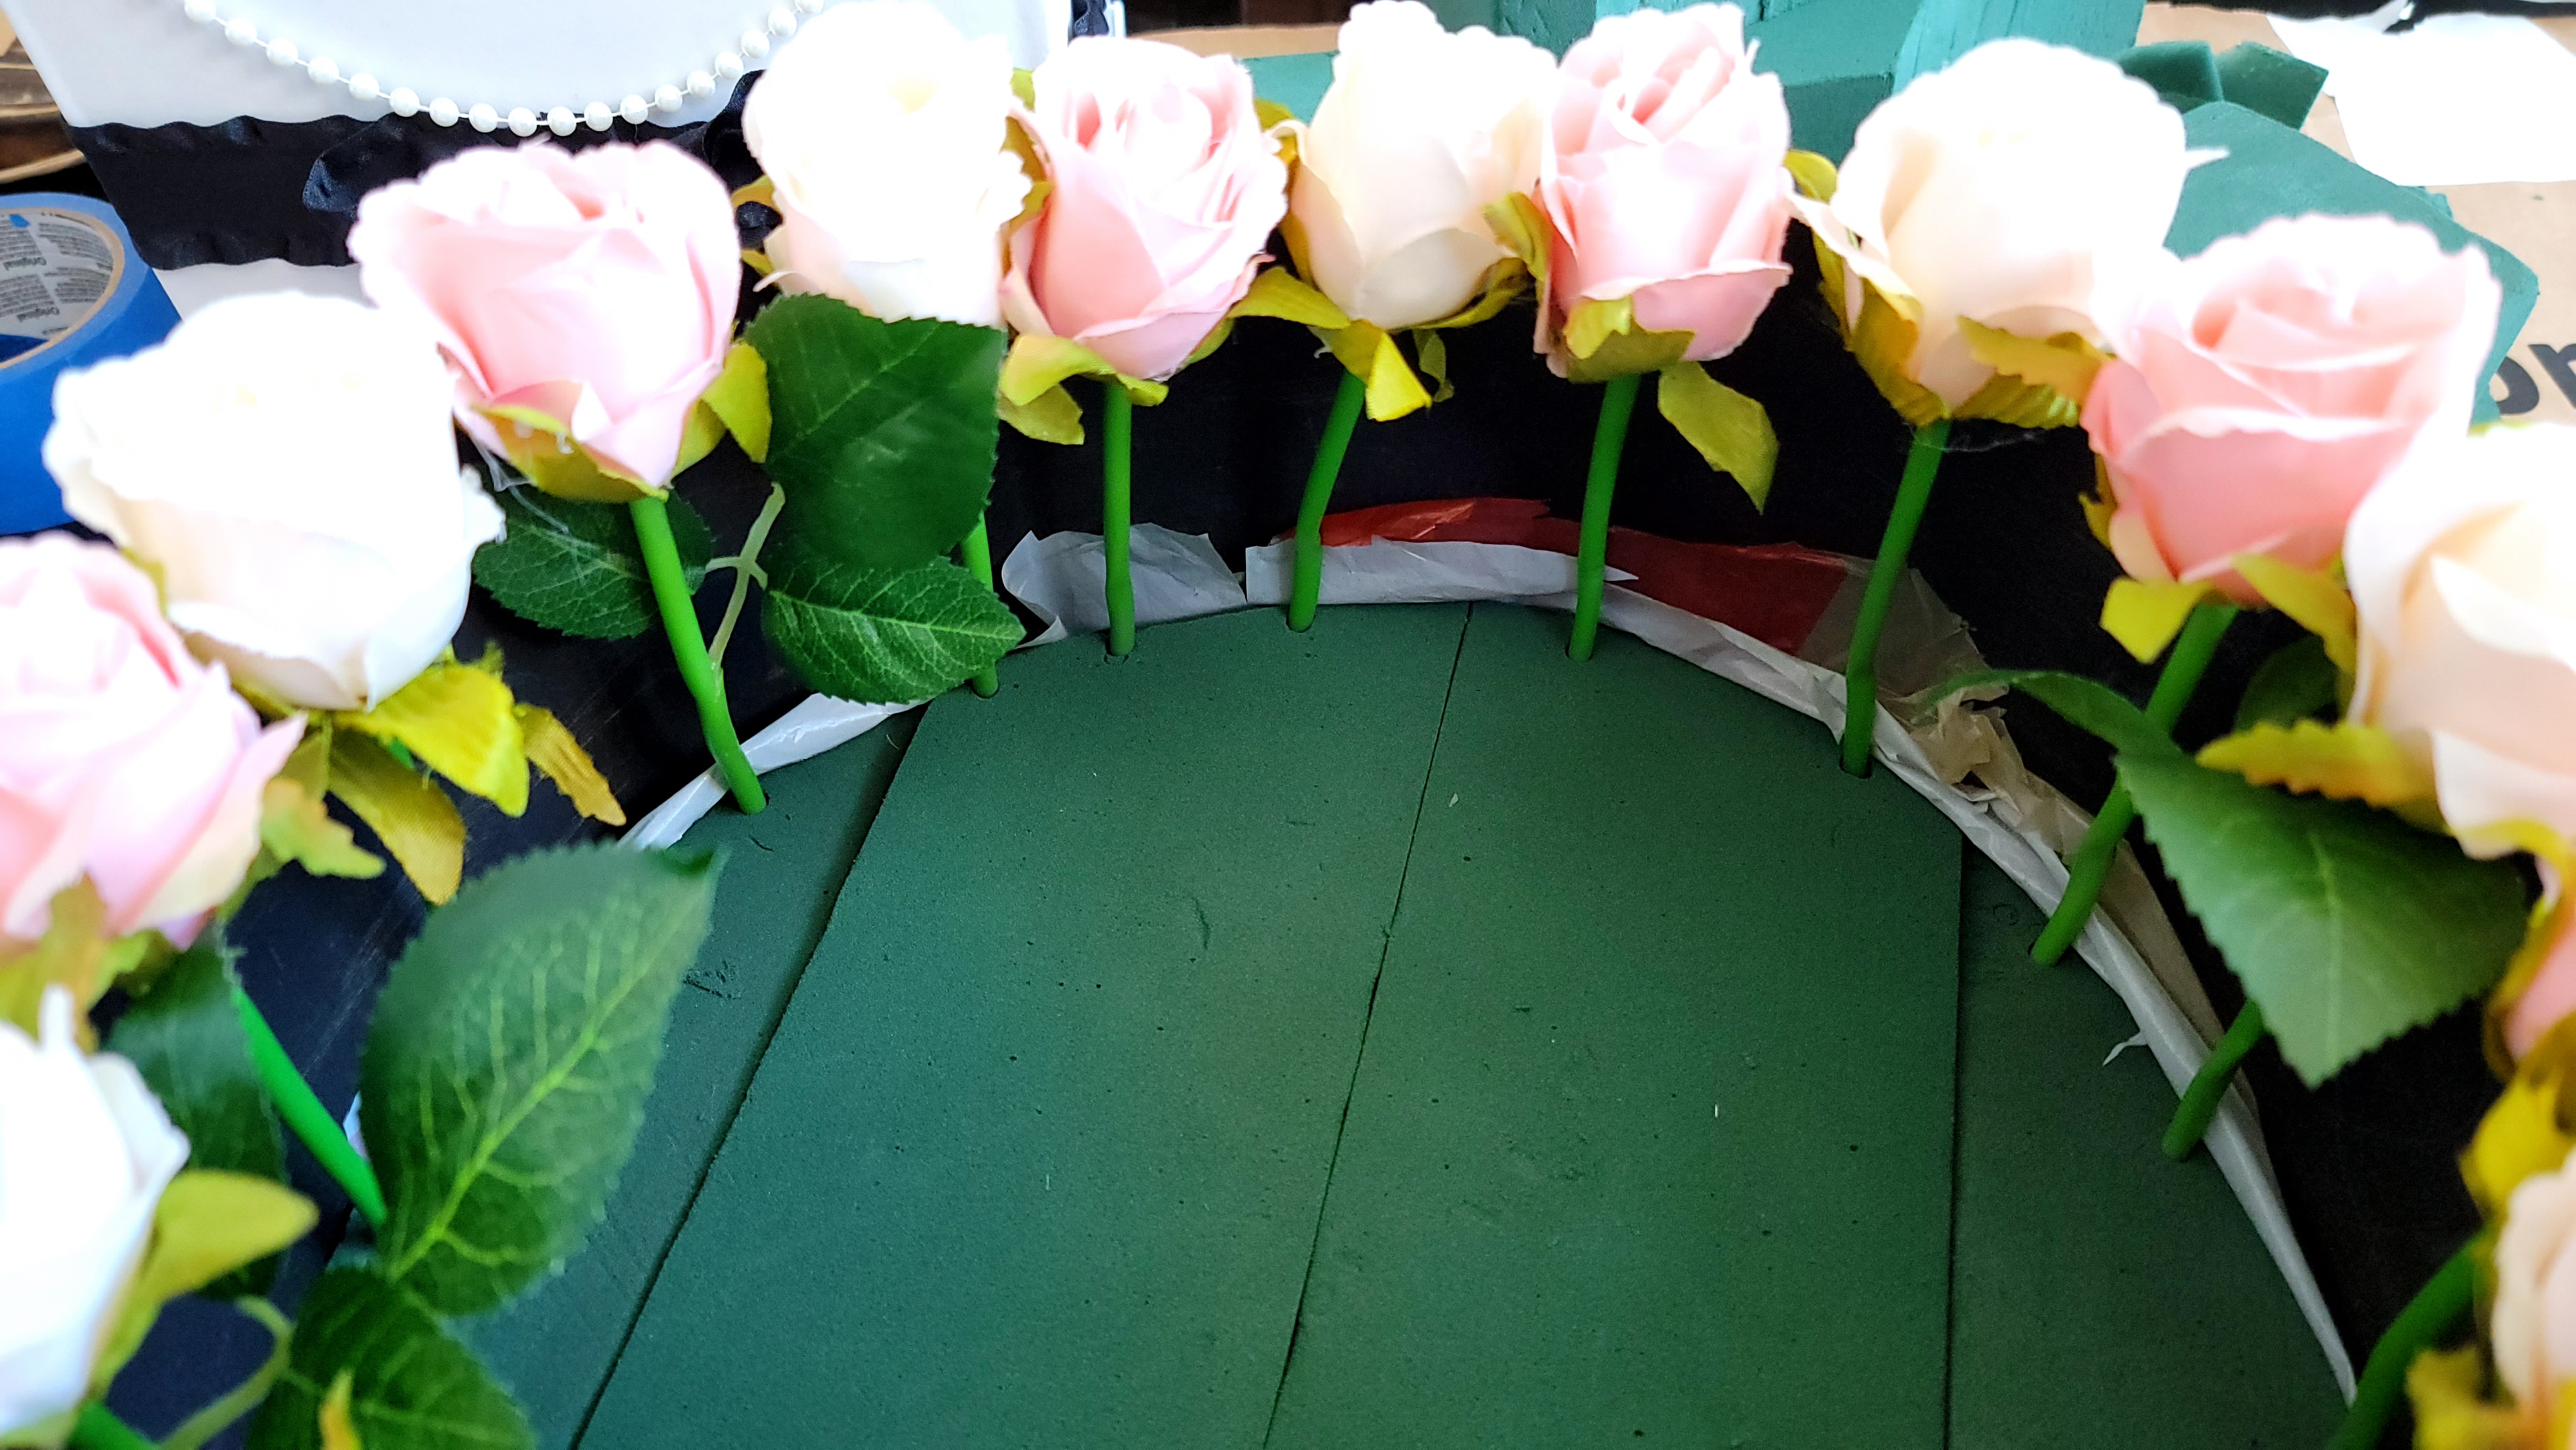
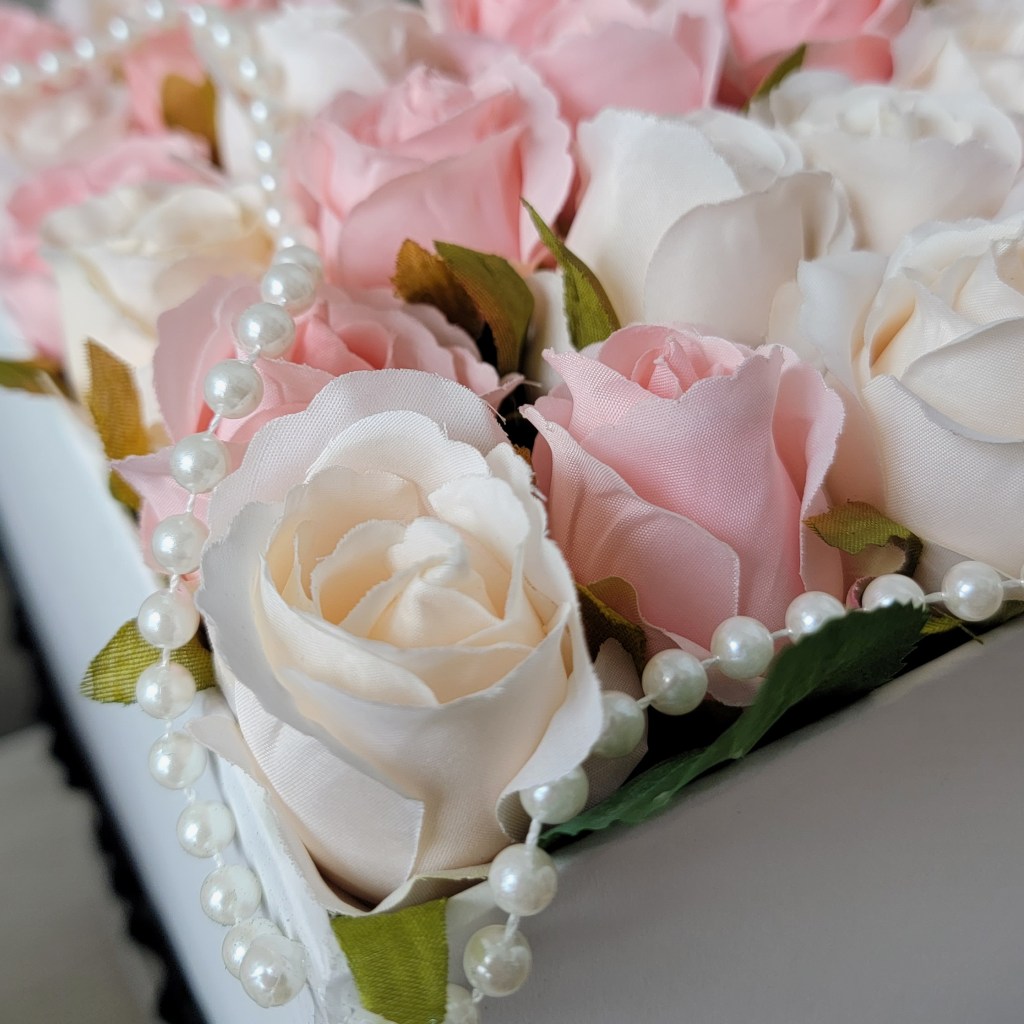
I started with alternating the flower colors near the rim and made my way toward the center. It may have been the florist in me but it just seemed easier to start large and then move to the smaller section. In the end, I filled in gaps with any extra flowers I had. I tried to place the roses the same distance apart but again flowers aren’t perfect and neither am I. Don’t stress too much about it because it’s supposed to be fun!
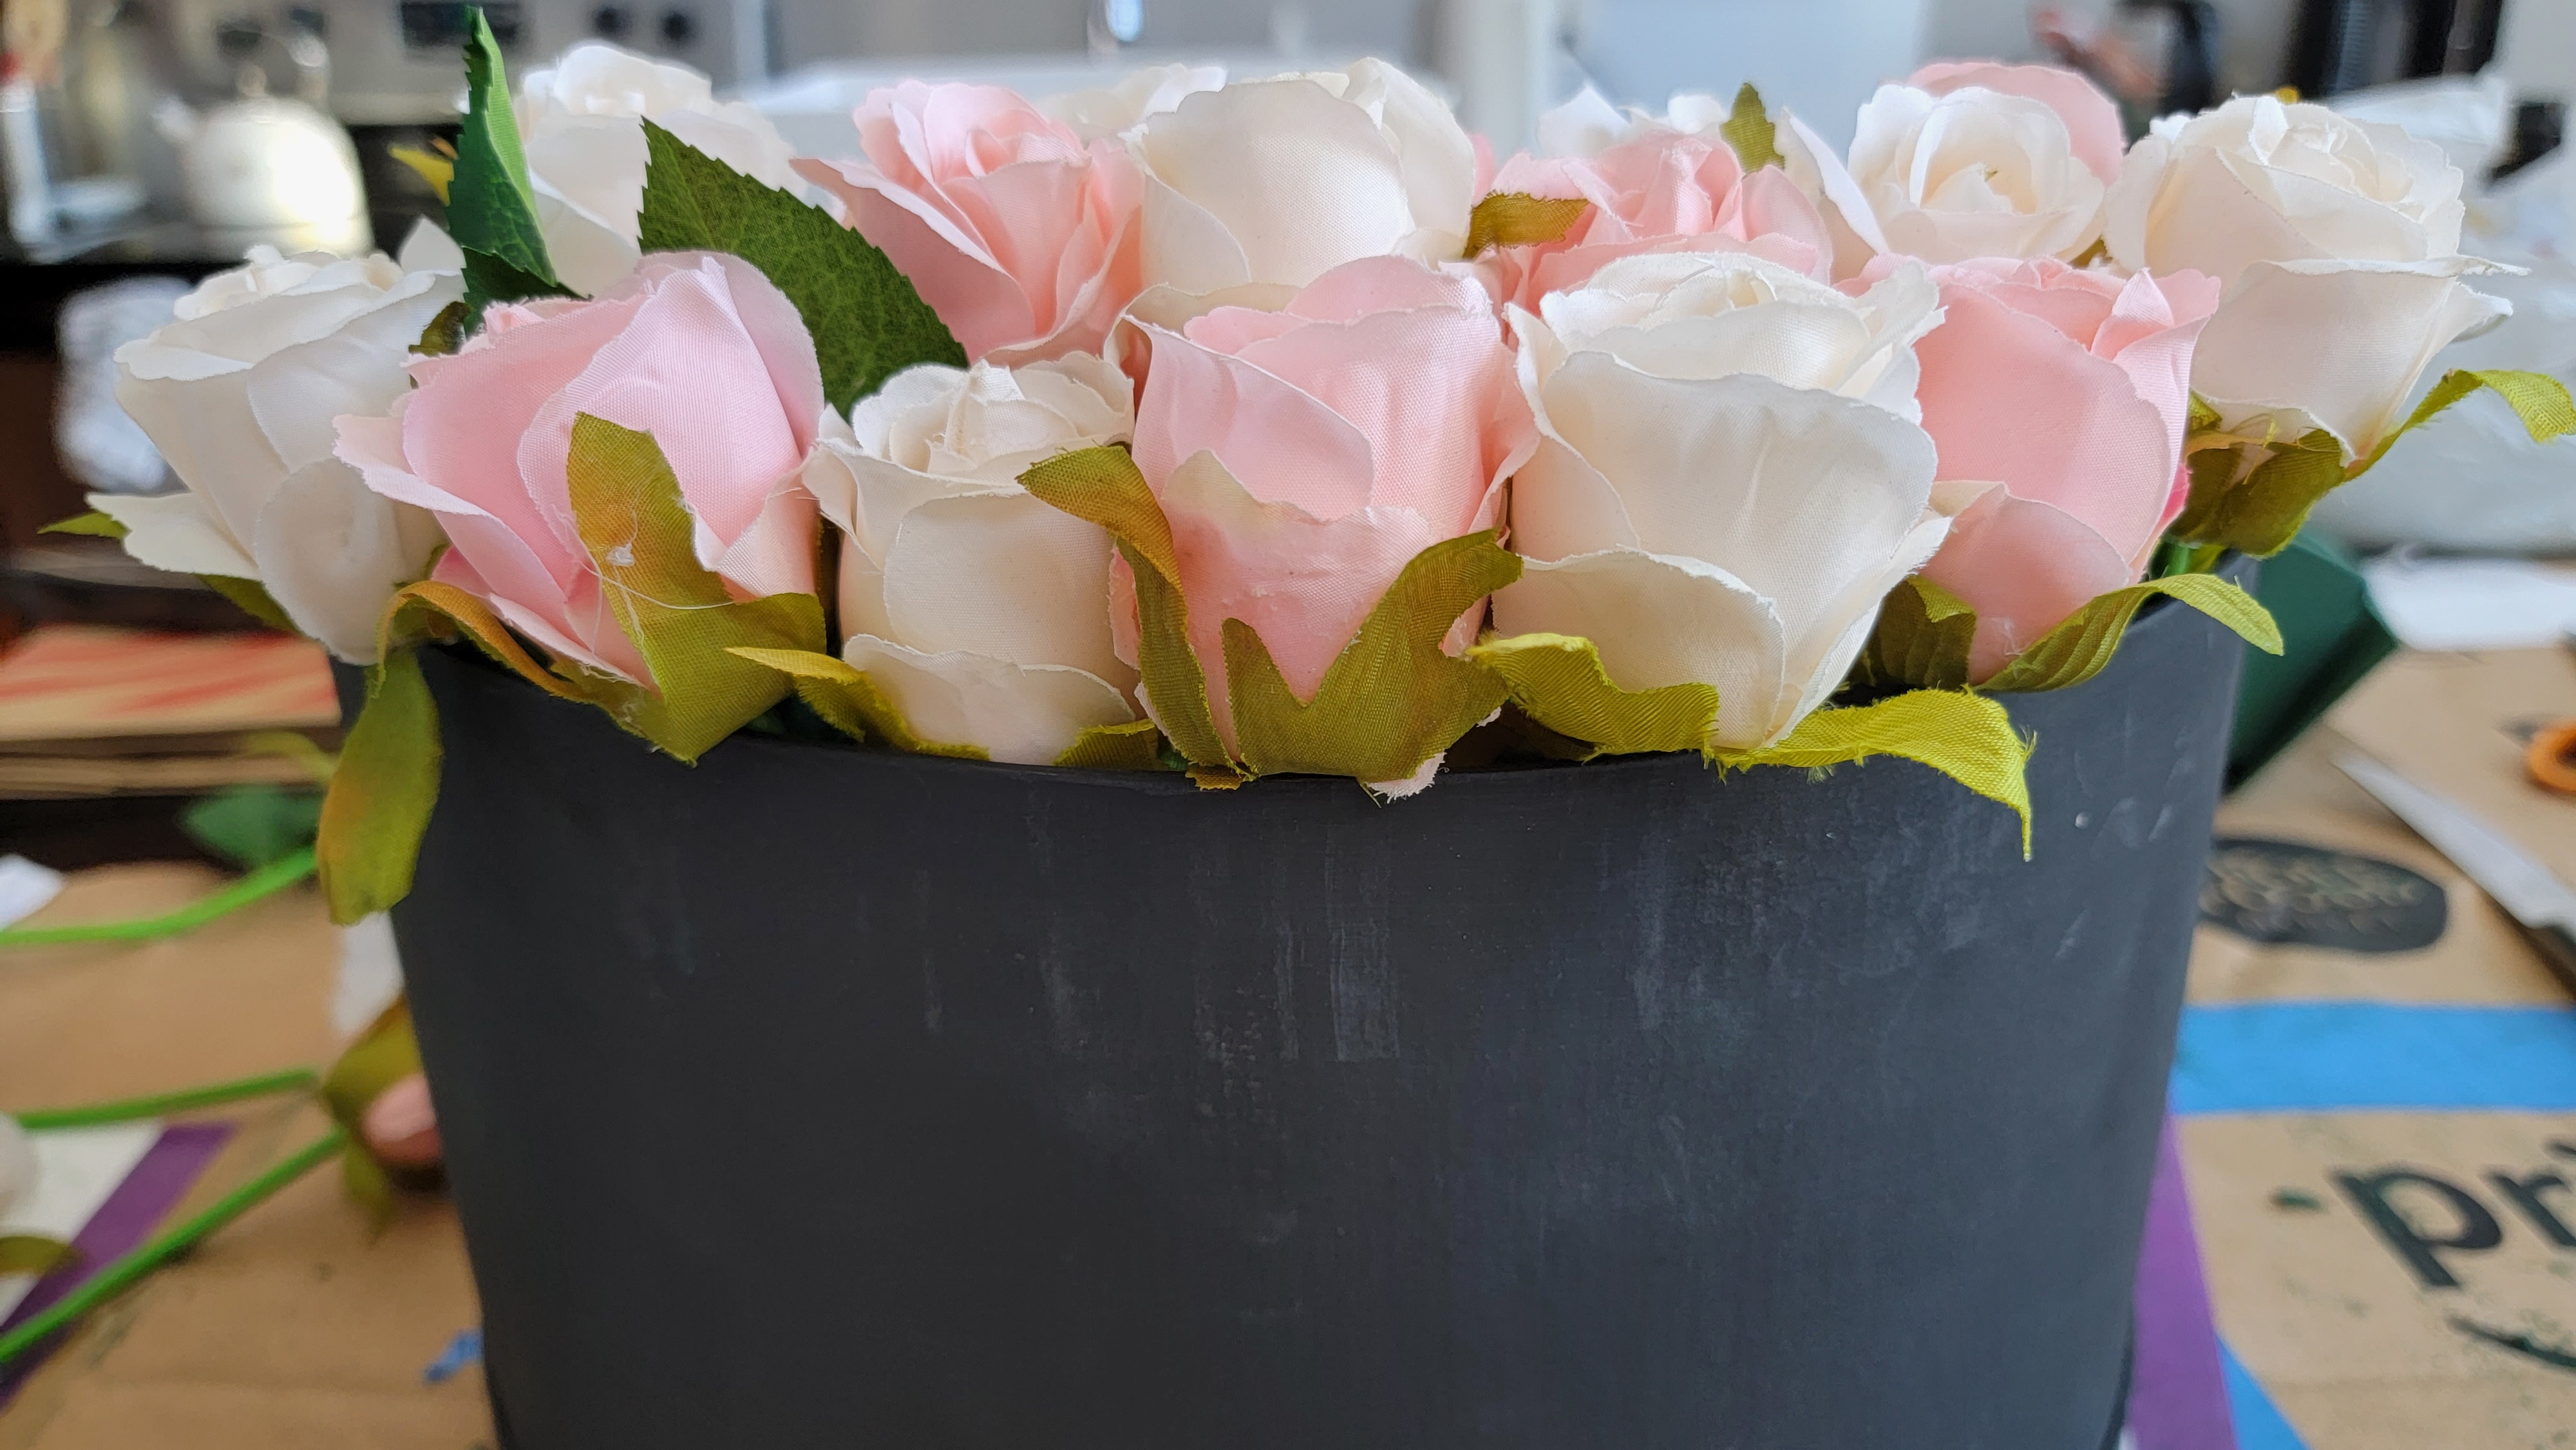
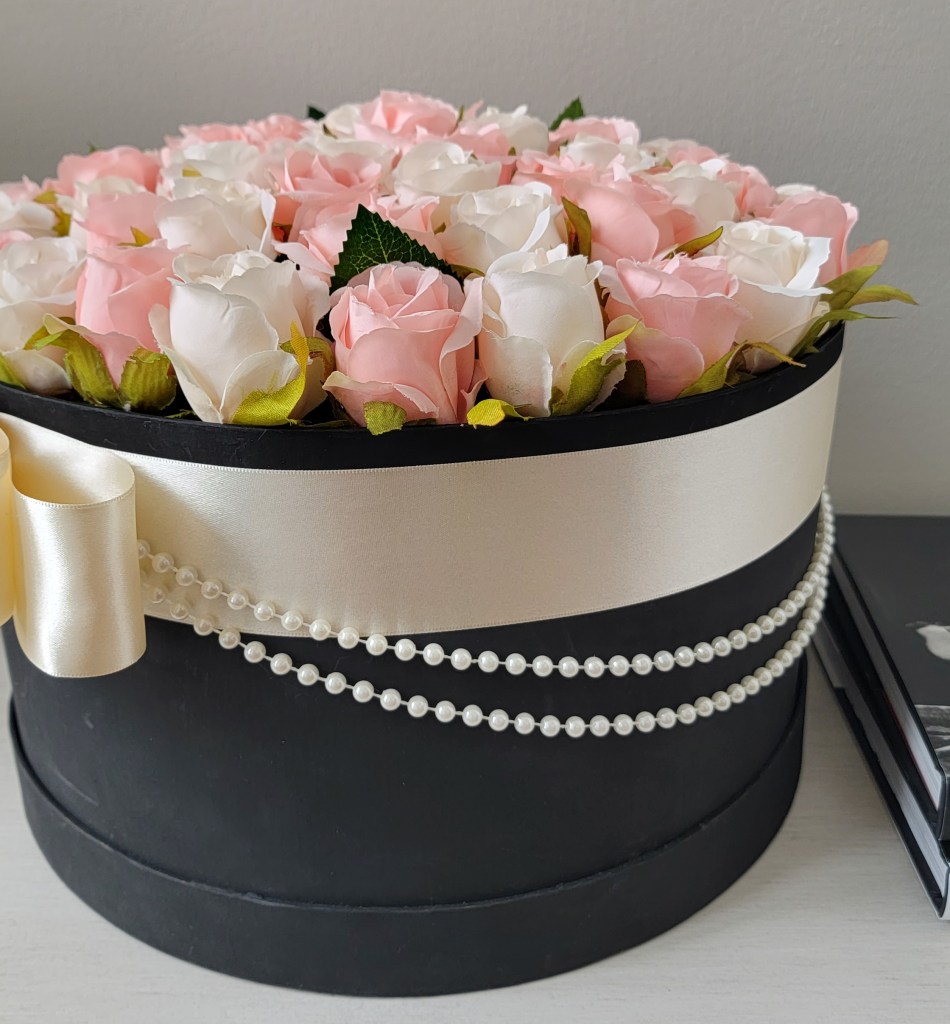
TA-DA! Congratulations!
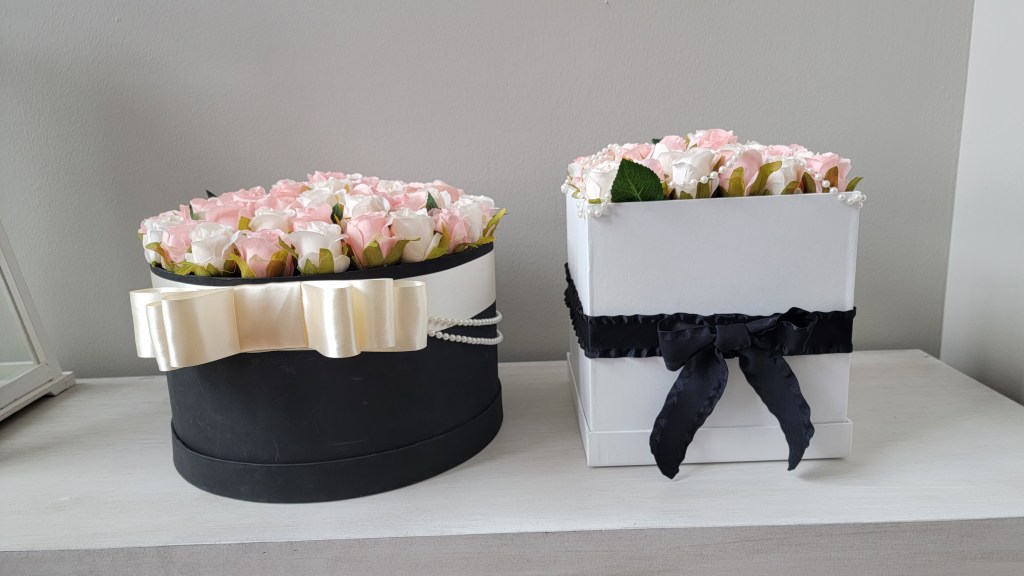
You now have an amazing luxury flower box that didn’t cost a fortune. Some people might think it’s easier to just buy the luxury flower box but where is the personality in that? I really enjoyed this project and it was the perfect Valentine gift to myself without breaking my wallet. I will definitely be making more of these in the future. It looks perfect on my sideboard. Almost like it was made to be there.
A bonus of doing this project is that you can continue to personalize it. You can replace the foam, lining, or flowers to continually get new looks in your home. I’m especially in love with the top-down view. I will be using these boxes for years to come and you can be sure they will make appearances on both the blog and my personal Instagrams.


Show me pictures of your DIY flower boxes!
I would love to see your photos. I find it very inspiring to see what others create and I know some people like making themed flowers like Disney, Marvel, or fashion brand names. Whatever you choose to make, use the hashtag #LiveWandering on Instagram or Twitter so I can see them!
Also, subscribe and like below if you enjoyed this article. It would be great if we could hang out more often. I’ll be sure to post more travel, lifestyle, and wellness topics in the future.
As Seen On Pinterest
Travel, Lifestyle, Wellness
Latest from the Blog

Unwinding by the Lake: My Experience at Surfside Resort
Wednesday The drive north stretched into evening, the sky dimming as I passed construction zones and wedding traffic winding its way toward Tofte. The tunnels glistened from fresh spray, the kind they lay down right before winter takes hold. By the time I reached Surfside, night had already claimed the shore. Lake Superior shimmered faintly…

Experience Radiant Rockies. A Reiki Session to Release Negativity and Restore Calm
The “Radiant Rockies” Reiki session, filmed along Bear Lake trailhead, helps individuals release negativity and reconnect with their inner calm through nature and energy healing. It symbolizes renewal, offering clarity for dreamers and wanderers seeking to move forward positively.

Ladies’ Night in Minneapolis: The Perfect City Escape
I recap my quick getaway to Minneapolis which provided a refreshing experience with chic dining, vibrant nightlife, and a cozy hotel stay, culminating in a delightful brunch, showcasing the city’s charm. Plus, an added bonus at the end of the post.
Join the Live Wandering Crew
Hey Wanderers! Ready to dive into a world of travel, wellness, and all things Reiki? Join the Live Wandering crew now! Get exclusive updates on thrilling adventures, soothing wellness tips, and the transformative power of Reiki. Let’s make every journey count! ✈️🌿🌀

Leave a comment